OwnCloud Usage
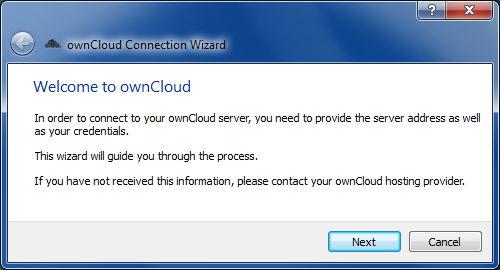
If you haven't installed ownCloud yet, please see: OwnCloudSetup Information on ownCloud usage has been taken from the ownCloud User Manual, which can be accessed from the following URL: doc.owncloud.comFirst Run
After ownCloud is installed, you should be able to find it in one of 3 places:- on Mac OS X: In the Applications folder
- on Windows: Start > All Programs > ownCloud
- on Ubuntu: In the dash (the big button on the top-left), search for 'ownCloud'
- If you are using a version of Ubuntu older than 12.04, or you don't use Unity, it should be in your menu under 'Accessories' (you can open it in a terminal by typing in
owncloud)
- If you are using a version of Ubuntu older than 12.04, or you don't use Unity, it should be in your menu under 'Accessories' (you can open it in a terminal by typing in
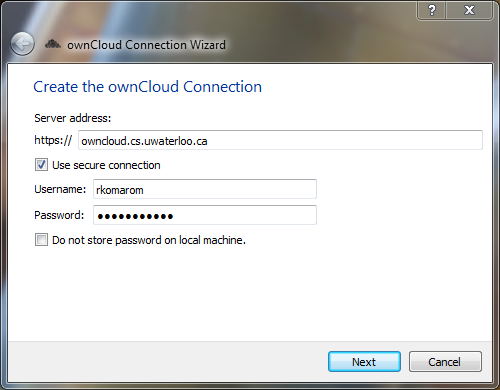
 Click "Next" and fill in the server address, your username, and your password.
Access via owncloud is done using CS Active Directory credentials.
If you aren't comfortable with ownCloud logging in every time it's opened, check the box for 'do not store Password on local machine.'
Click "Next" and fill in the server address, your username, and your password.
Access via owncloud is done using CS Active Directory credentials.
If you aren't comfortable with ownCloud logging in every time it's opened, check the box for 'do not store Password on local machine.' - You will have to enter your password every time you run ownCloud if you choose to do this
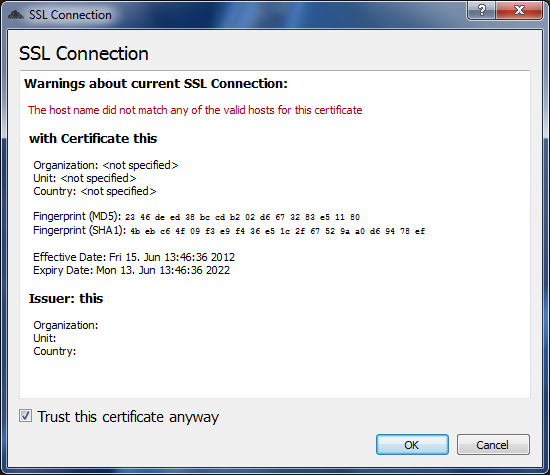
 Whenever you configure ownCloud to connect to a server, it will fetch some security info from that server.
It will ask you if you wish to continue connecting, or if you don't trust the server, to stop.
You can trust the CS ownCloud server.
 When you select to trust the server, ownCloud should finish the connection.
It will also set up a sync folder for you on the server, and your computer.
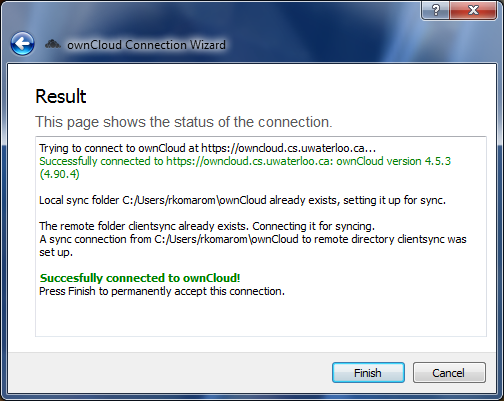 ownCloud will now tell you it's syncing your files with the server.
It will tell you this every time it starts up again, and should not need to be reconfigured.
 If you would like to sync more file locations, open the ownCloud congifuration. ownCloud lives in your system tray, it can be hard to notice with the colours in Ubuntu, or auto-hiding in Windows.
In Windows, it hides itself, so you will usually need to expand the tray to find ownCloud.
In Ubuntu, sometimes it doesn't appear right away, and you might need to log out and try again if it doesn't show up.
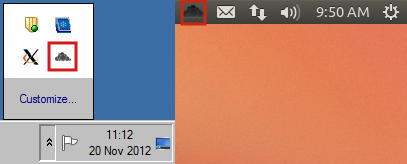 Once we've found ownCloud in the tray, we'll want to Right-Click on the icon (a black cloud), and select 'Configure...'
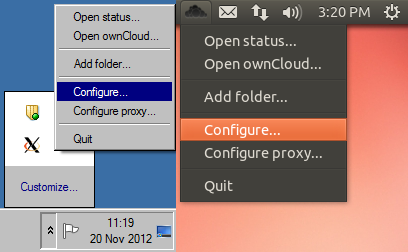 This opens ownCloud's settings window.
In here, we will tell ownCloud where to find the CS ownCloud server. Please refer to the instructions in the beginning of this section to complete the set-up.
Auto-starting ownCloud
Ubuntu
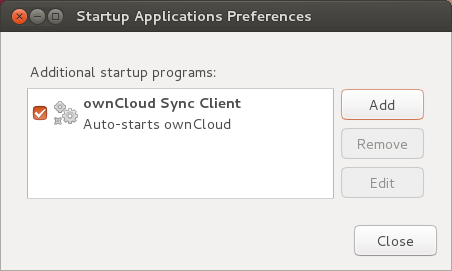
We will need to open 'Startup Applications', which can be searched for in the Unity Dash.When you launch it, it will open a window like this:
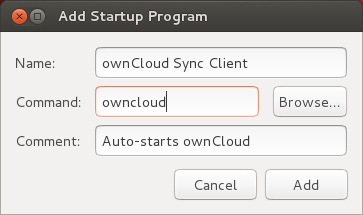
 Click on 'Add', and another window will pop up.
You will need to enter in
owncloud as the Command.Click 'Add' on the new window when you're done filling it in:
 When you see ownCloud listed back on the first window, you're done!
You can now close the window, and ownCloud will start whenever you log in.
Windows 7
To auto-start ownCloud in Windows, create a shortcut to ownCloud and place it in the startup folder. The startup folder is a hidden folder located at:C:\Users\(User-Name)\AppData\Roaming\Microsoft\Windows\Start Menu\Programs\Startup
You can open it by going to the start menu, typing "shell:startup" and pressing Enter.
Synchronizing files
To sync your files with ownCloud, just put your files into your ownCloud folder.ownCloud should take care of the rest. You can find your ownCloud folder inside your home folder.
It can be hard to find in Windows, but you should be able to reach it through the start menu:
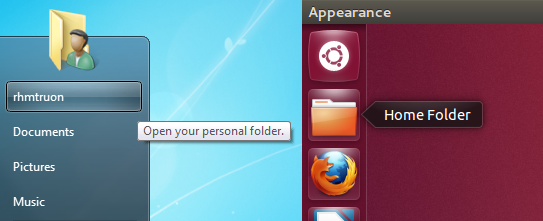 After you click your userid in the start menu, you will see ownCloud in your home folder:
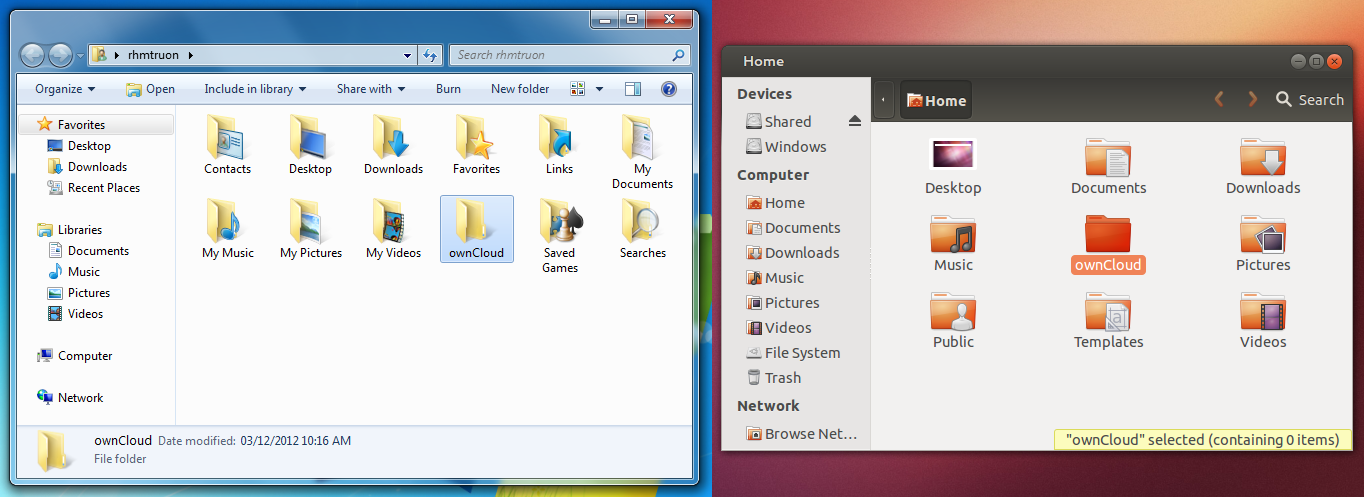
Using custom folders
One of the advantages of ownCloud over similar programs, is that ownCloud lets you sync almost any folder.Unfortunately, we need to tell ownCloud where our folders are first. We will begin by opening ownCloud's status window.
Find ownCloud in the tray, and double-click it, or right click and select "Open Status"
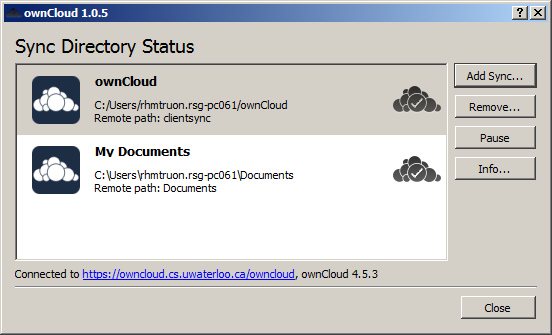
If you did it right, something like this should appear on your screen:
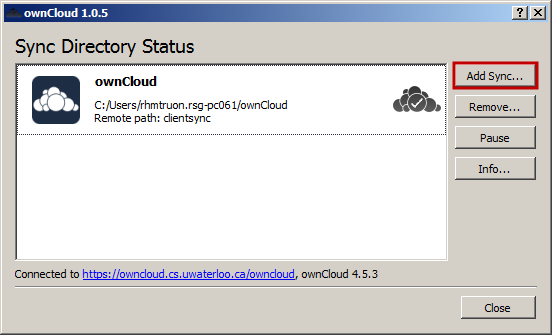 Click the "Add Sync" button.
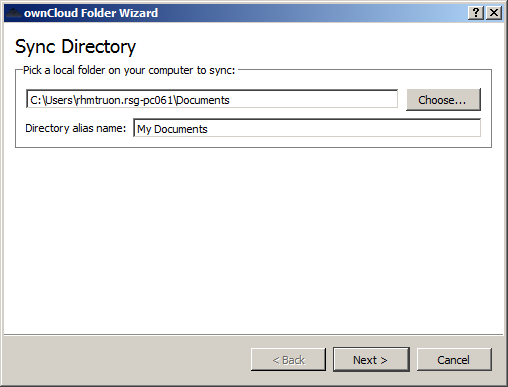
This opens a window asking us for what folder we want to sync, and a name for the folder.
For example, maybe I want to sync My Documents in ownCloud:
 The next step asks where we would like to sync the data.
Since this is an ownCloud guide, I am syncing my data with ownCloud.
When you choose a new folder name, you will need to create it on the server first, by pressing "create"
After the folder has been created in ownCloud, click "Finish"The status window will now show your new custom folder:
Using the web interface
Adding Bookmarks
There are two methods to add / use bookmarks: using the main ownCloud interface, or the bookmarlet feature.Bookmark Interface
Click on "Bookmarks" on the left navigation pane.Fill in the address (URL), title, and tags (enter tags separated by a space).
If you click on a tag, ownCloud will only display the bookmarks that are described with that tag.

Bookmarklet
The bookmarklet can be accessed from your personal settings. Click on the gear button (Settings) in the bottom left corner of the web interface and then select "Personal". From the main menu, stroll to the bottom, and under Bookmarklet add the link for the "Read Later" button to your bookmarks. This can be done by dragging the button to your bookmarks folder or toolbar in your browser or by right-clicking the button and selecting the option to add to bookmarks:
When you are on a webpage you would like to add to your ownCloud bookmarks, you simply click on the bookmark you added in the previous step and a window will pop up letting you know the bookmark has been saved. The bookmark will show up as an unnamed bookmark in the web interface.
Contacts
Adding Contacts
You can add contacts manually or by importing VCF files.To upload a VCF file, visit the Contacts page and click the Import button (black arrow pointing up) near the bottom left of the interface.
To add a contact manually, click the Add Contact button (to the left of the Import button) and fill in the contact's details.
You can save contacts to an existing address book or create a new address book. The default address book is labelled "Contacts".
You can add a picture for your contacts by hovering your mouse over the contact's default picture and selecting the button to upload a new photo or choose a photo from ownCloud.
Creating a New Address Book
To create a new address book, click on Settings (the gear to the right of the Import button), "More ...", and "New Address Book". You can also manage your existing address books from here.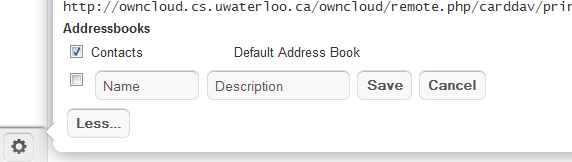
Keeping Your Address Book in Sync
Syncing with Andriod
- Install CardDAV-Sync (free beta) from the Google Play store by visiting this link:
- This app supports auto-configuration, which is a Boon - after installing visit this link carddavs://owncloud.example.net/remote.php/carddav/ to auto configure the app
- Enter your login details
- After the app has checked your login details you may select the Sync server to phone option
Syncing your IOS device
- Open the settings application.
- Select Mail, Contacts, Calendars.
- Select "Add Account".
- Select "other" as account type.
- Select "Add CardDAV account".
- For server, type: http://owncloud.cs.uwaterloo.ca/remote.php/carddav/principals/*username
 *
* - Make sure to replace *username* with your UW userid in the above URL
- Enter your user name and password.
- Select Next.
- If your server does not support SSL, a warning will be displayed. Select Continue.
- If the iPhone is unable to verify the account information perform the following:
- Select OK.
- Select advanced settings.
- Make sure "Use SSL" is set to OFF.
- Change port to 80.
- Go back to account information and hit Save.
- Select OK.
Other Syncing Options
- Other syncing options for mobile devices can be found at the following site: owncloud.com/overview/mobileapps
Music and Photos
Any music and photos you have synced in your "Files" location will automatically be organized and viewable in the "Music" and "Pictures" locations, respectively.Calendar
Creating a calendar
If you use the calendar the first time, there will already be a calendar called "calendar". You can manage your calendars with a click on the "Calendar" button in the top right corner. In the dialog that appears, you can add, edit, export, enable, disable and delete your calendars. There will be also a link for CalDav access.Synchronising Calendars with CalDav
You can access your calendars with CalDAV-compatible programs like Kontact, Evolution and Thunderbird using the following URL: http://ADDRESS/apps/calendar/caldav.phpTo use the ownCloud calendar with Apple iCal, you will need to use the following URL, including the trailing slash: http://ADDRESS/apps/calendar/caldav.php/principals/username/
Mozilla Lightning users need to this URL scheme: https://ADDRESS/remote.php/caldav/calendars/USERNAME/CALENDARNAME
Creating events
To create an event, just click on the date in the month view or choose the timeframe in the weekview. In the dialog that appears, you can enter your information (title, category, etc).With the advanced options you can set the description, the location and the repetition rate of an event. If the repeating should end, you can choose between setting the end by date or by occurrences. If you choose in the weekview, all days from Monday to Friday will automatically set the repeat rule to "every weekday". If the interval of the weekview can be divided by two, it automatically sets the repeat rule to "bi-weekly".
Exporting / Importing events
Export
You can export either a single event or a whole calendar. If you want to export a single event click on it and press the export button in the bottom right corner. If you want to export a whole calendar use the "Calendar" button as described in the section "Creating a Calendar"Import
Import your calendar as ical file using the files app. Just click on the calendar file to open the import dialog. You can import the calendar into a new calendar or into an already existing calendar. Note: If the progressbar does not work properly, the folder apps/calendar/import_tmp/ has probably no write permission.Why is the calendar app asking for my current location?
The calendar needs your current position in order to detect your timezone. Without the correct timezone there will be a time offset between the events in ownCloud and your desktop calendar you synchronize with ownCloud. You can also set the timezone manually in the personal settings.Access Control
Set ALLOWTOPICCHANGE = LawrenceFolland,Main.RaymondTruong,Main.AlessandroCosentinoTroubleshooting
Ubuntu "CSync failed to create a lock file"
If you receive a "CSync failed to create a lock file" error within the ownCloud client, you will have to remove the 'lock' file for ownCloud.This file can be found at the following location:
~/.local/share/data/ownCloudSimply use the following command to remove it:
rm ~/.local/share/data/ownCloud/lockAfter restarting the ownCloud client the problem should be resolved.
Topic revision: r20 - 2015-12-08 - DanielAllen
Information in this area is meant for use by CSCF staff and is not official documentation, but anybody who is interested is welcome to use it if they find it useful.
- CF Web
- CF Web Home
- Changes
- Index
- Search
- Administration
- Communication
- Hardware
- HelpDeskGuide
- Infrastructure
- InternalProjects
- Linux
- MachineNotes
- Macintosh
- Management
- Networking
- Printing
- Research
- Security
- Software
- Solaris
- StaffStuff
- TaskGroups
- TermGoals
- Teaching
- UserSupport
- Vendors
- Windows
- XHier
- Other Webs
- My links
 |
|
Ideas, requests, problems regarding TWiki? Send feedback