NetTop Usage
Overview
CS Nettops are basic machines that load their software off the network.This approach has its advantages, as well as several pitfalls.
The nettops run a custom installation of the Ubuntu operating system
Getting Started
If you have never used Ubuntu before, it might be a good idea to read Getting Started with Ubuntu 12.04 - 2nd Edition- You may wish to skip to the section "The Ubuntu Desktop" on page 21 of the manual, and avoid reading the sections: "Installation" and "Software Management"
For those who are somewhat familiar with a Linux or UNIX system, but not familiar with Ubuntu, you might want to take a look at the Unity Quick Reference Poster
Key Differences from Typical Machines
The nettops, as briefly mentioned earlier, load all system software off our network.Because of this, they are configured somewhat differently than the others.
Some of the key differences are listed below:
- Network connection is an absolute necessity
- If the unit is not connected properly, it will not start at all
- While the unit is disconnected from the network, it will freeze, and become unable to perform any work
- It won't be able to recover if it is disconnected for too long
- The nettops don't have a hard drive
- Only the Home directory is preserved when the unit is shutdown, it is stored on the network
- System updates are made to the central server, and are loaded by the nettops when they restart
Known Issues
- Users can't install or update software
- Currently, only system admins can install software onto the Ubuntu system
- Rebooting the system will reload the machine with the latest available software from our server
- Sound doesn't work
- Machine will not shutdown/restart/sleep/hibernate
- This is an issue with our setup, not much can be done about this right now
- To turn off the nettop, press and hold the power button, until the machine turns off
- Push the button when it is off to turn it back on
Connecting to Unix/Linux machines
To connect to another Unix/Linux machine, you will need to use SSHTo ssh into another machine, simply open a terminal, and type in
ssh -X servername
For example, to ssh into linux.cs, we would: - Open a terminal (Press Ctrl + Alt + T)
- Type into the terminal:
ssh -X linux.cs- If
-Xis not in the command, you will only be able to use terminal(text-only) programs from the server
- If
- Press Enter
You will be disconnected from the server if you choose not to trust it.
 The server will then ask for your password:
 When the connection has been established, you will now have a shell access to your account on the server.
You can now run applications that are installed on the server, but are not on your machine.
To log out, enter
exit into the terminal, or on a blank line, press Ctrl + D It is also possible to connect to a server without entering a password.
Instructions on doing this are found here
Connecting to Windows servers
If you'd like to work with a Windows environment, you'll need to connect to a Windows server.The CS Grad server is windows.cs
We recommend using the Remmina Remote Desktop Client to connect to Windows servers.
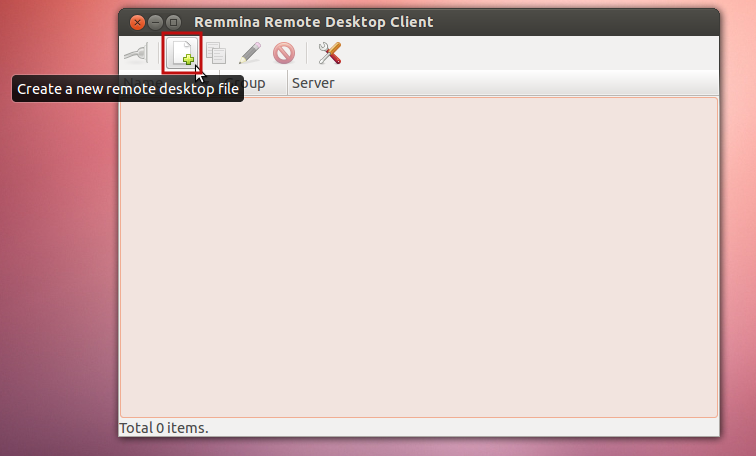
When you first open Remmina, it does not know where to find our server.
We will start by making a new server connection:
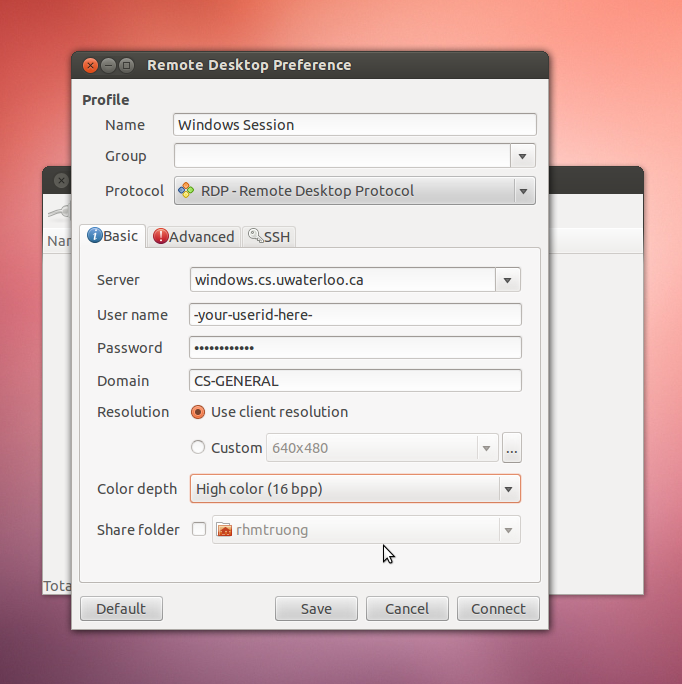
 A window will appear with various settings, it should be filled in like this:
These are the recommended settings if you plan on using Windows in fullscreen.
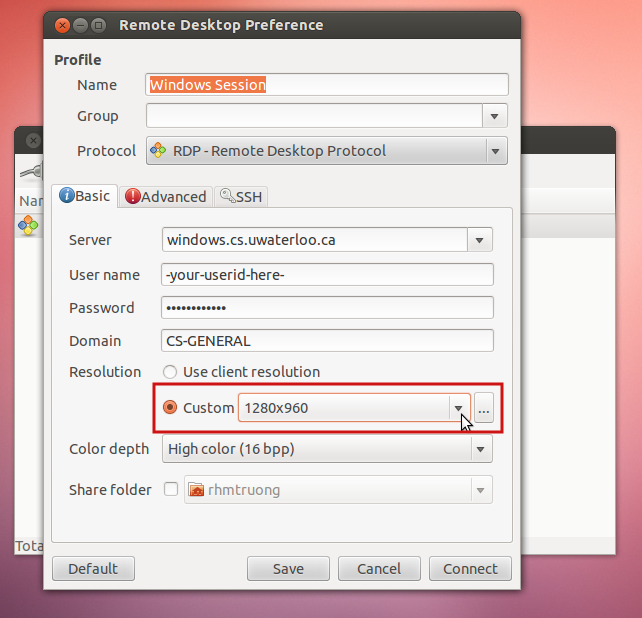
 If you want to connect in a window, we recommend setting the screen resolution to 1280x960 or lower:
 To save these settings, press the 'Save' button, or the press 'Connect' to save these settings and connect to the server.
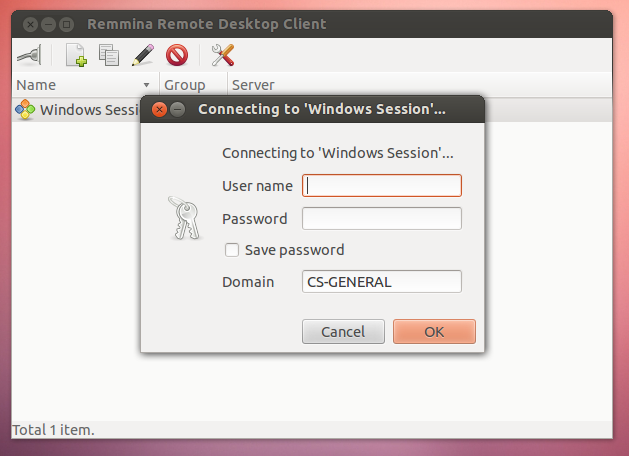
If you did not enter your userid and password into the settings screen, you will be asked to enter them every time you connect:
 The first time connecting after a settings change, or connecting to a new server, Remmina will ask you if you trust this server.
Remmina will not connect if you tell it you don't trust the server on the other end, or if you entered in your userid or password incorrectly:
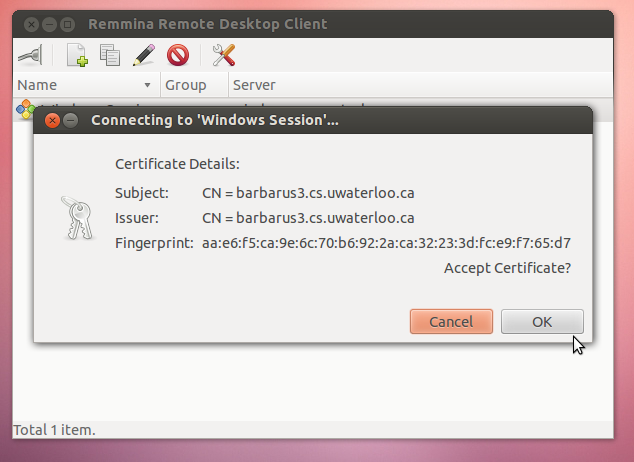 After you tell Remmina to trust the CS Grad server, you will be greeted by a screen like this:
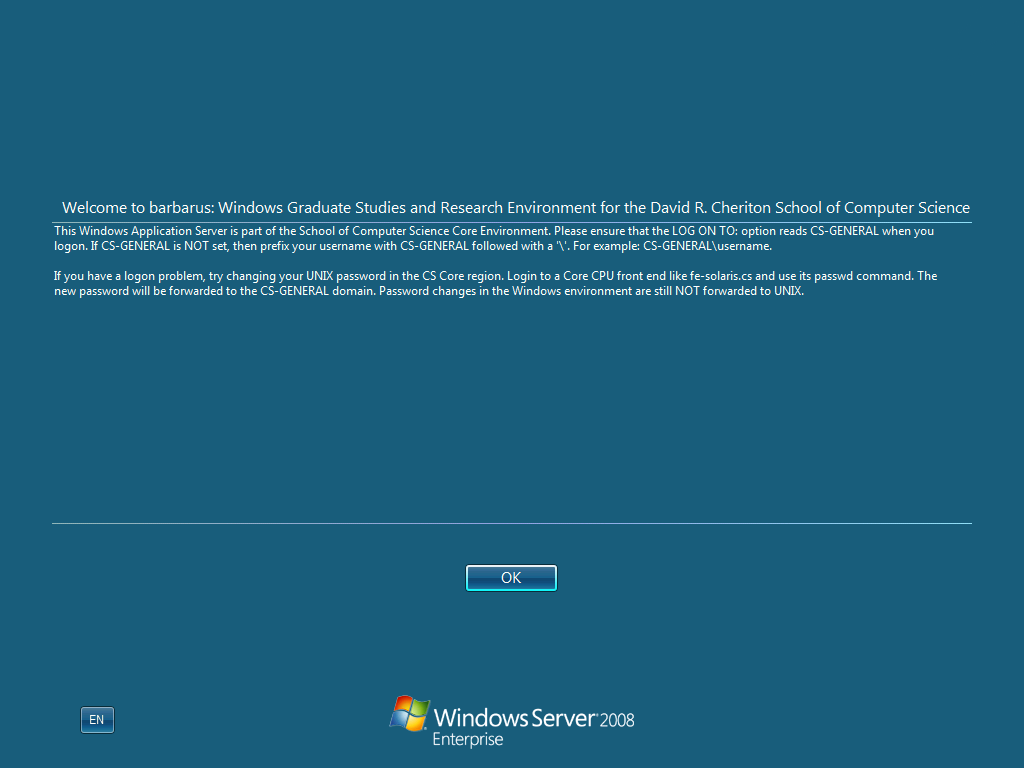
Press OK, and you will be logged in to Windows.
Useful software tools
Printing
Printers have already been setup for use by the nettops.Most CS Grad printers should be available for use when a document is printed.
Selecting a default printer
Setting a default printer will save you the trouble of selecting one every time you print.Start by opening "System Settings", its icon looks like this:
It takes a few seconds to respond, so don't worry if nothing happens at first.
 A printer settings window should open, it looks something like this:
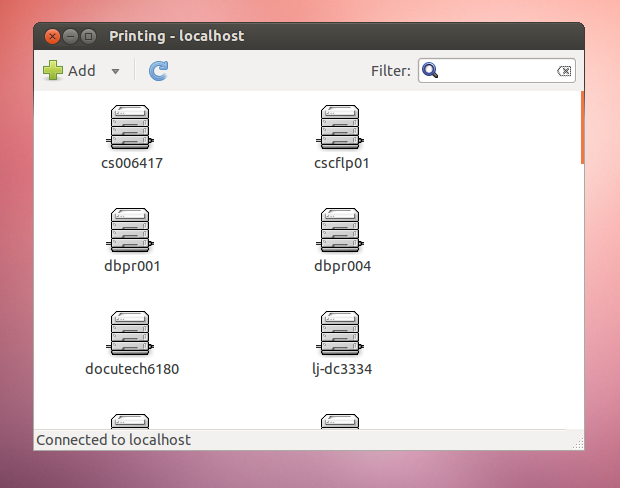 When you find the printer you want to use, right click it, and select "Set As Default"
This dialog should pop up:
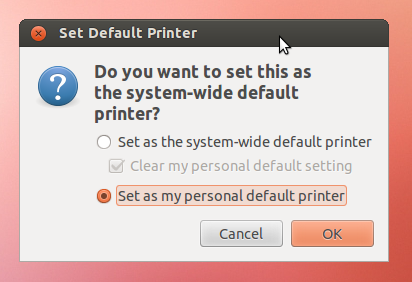
Make sure you choose "Set as my personal default printer", nettops will not let you change system-wide settings.
| I | Attachment | History | Action | Size | Date | Who | Comment |
|---|---|---|---|---|---|---|---|
| |
default-printer.png | r1 | manage | 46.5 K | 2012-11-05 - 13:16 | RaymondTruong | Default printer dialog |
| |
printer-settings.png | r1 | manage | 74.7 K | 2012-11-05 - 11:51 | RaymondTruong | Printer settings |
| |
remmina-cert-dialog.png | r1 | manage | 72.8 K | 2012-10-18 - 15:32 | RaymondTruong | screen capture of certificate dialog |
| |
remmina-login-dialog.png | r1 | manage | 67.9 K | 2012-10-16 - 16:26 | RaymondTruong | login dialog if credentials aren't saved |
| |
remmina-new-connection.png | r1 | manage | 88.2 K | 2012-10-16 - 15:48 | RaymondTruong | Making a new connection in remmina |
| |
remmina-recommended-settings.png | r1 | manage | 164.0 K | 2012-10-16 - 16:19 | RaymondTruong | recommended settings for remmina |
| |
remmina-screen-resolution.png | r2 r1 | manage | 151.1 K | 2012-10-22 - 09:11 | RaymondTruong | Screenshot highlighting resolution settings |
| |
remmina-session.png | r1 | manage | 47.7 K | 2012-10-22 - 09:50 | RaymondTruong | greeting message from barbarus |
| |
ss-icon.png | r1 | manage | 5.7 K | 2012-11-05 - 11:38 | RaymondTruong | The icon for System Settings |
| |
ssh-pw.png | r2 r1 | manage | 34.2 K | 2012-10-16 - 13:59 | RaymondTruong | ssh password dialog |
| |
ssh-shell.png | r1 | manage | 79.0 K | 2012-10-16 - 14:05 | RaymondTruong | ssh shell session |
| |
ssh-trust.png | r3 r2 r1 | manage | 24.7 K | 2012-10-16 - 13:57 | RaymondTruong | Picture of first login dialog |
| |
system-settings.png | r1 | manage | 177.3 K | 2012-11-05 - 11:42 | RaymondTruong | Screenshot of the system settings window |
Topic revision: r10 - 2012-11-16 - RaymondTruong
Information in this area is meant for use by CSCF staff and is not official documentation, but anybody who is interested is welcome to use it if they find it useful.
- CF Web
- CF Web Home
- Changes
- Index
- Search
- Administration
- Communication
- Hardware
- HelpDeskGuide
- Infrastructure
- InternalProjects
- Linux
- MachineNotes
- Macintosh
- Management
- Networking
- Printing
- Research
- Security
- Software
- Solaris
- StaffStuff
- TaskGroups
- TermGoals
- Teaching
- UserSupport
- Vendors
- Windows
- XHier
- Other Webs
- My links
Ideas, requests, problems regarding TWiki? Send feedback


