TWiki> CF Web>CscfSpecific>SchoolPCnotes>GradStudentPCdeployment>GradStudentLaptopDeployment>LprPrintingForWindows (2014-10-09, FraserGunn)
 EditAttach
LPR Printing for Windows
Note for Wireless Laptop users
You will not be able to print using the LPR protocol while connected wirelessly. The only alternative currently available is to use the Windows SMB protocol, using smb-printers.cs.uwaterloo.ca or smb-printers.student.cs as appropriate, as the server. Using SMB is in fact the preferred method for printing from workstations; LPR is used primarily to dodge a problem with Linux workstations that has yet to be resolved.Adding Unix LPR Print Services to Windows
- Open Control Panel
- Add/Remove Programs
- Add/Remove Windows Components (see left hand column)
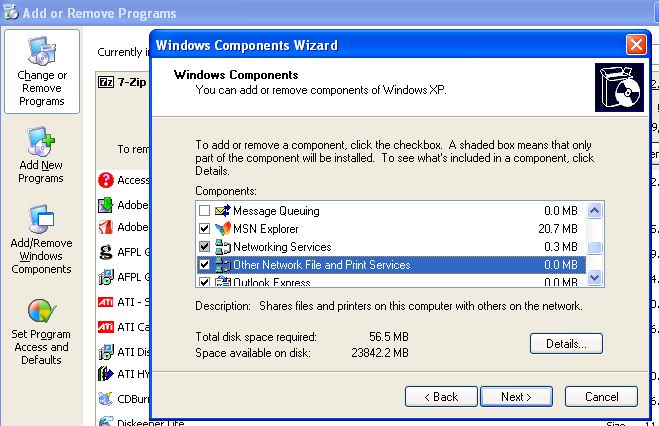
- Check Other Network File and Print Services:
, Click on "Details"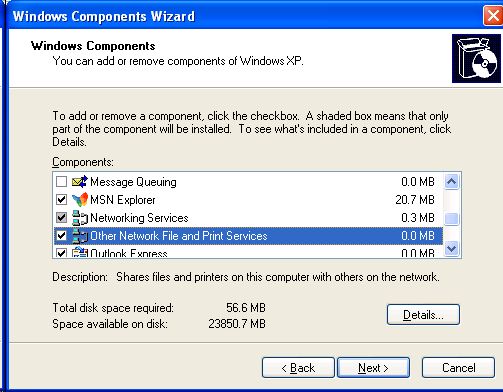
- Check Print Service For Unix:
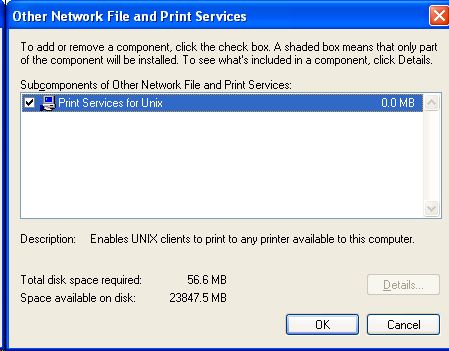
- Point to C:\i386 when it asks for XP CD!
Adding LPR Printers
- Open Printers and Faxes
- Add a printer (Under printer Tasks)
- Printer Wizard Starts
- Next
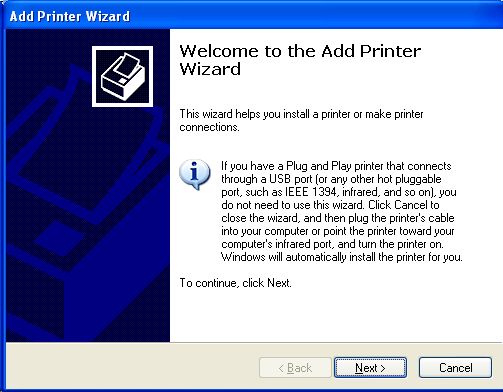
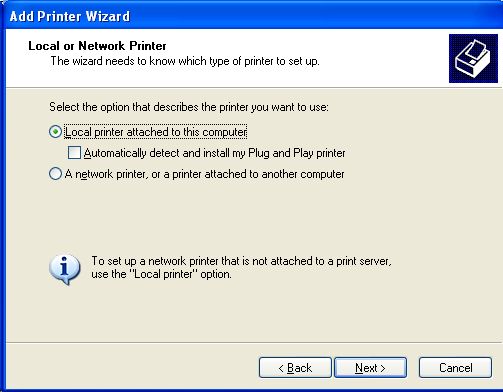
- Add Printer Wizard Screen Appears
- Pick Local printer attached to this computer (no kidding!)
- Uncheck Automatically detect and install my Plug and Play printer (Otherwise Windows will aimlessly seach for a printer)
- Next
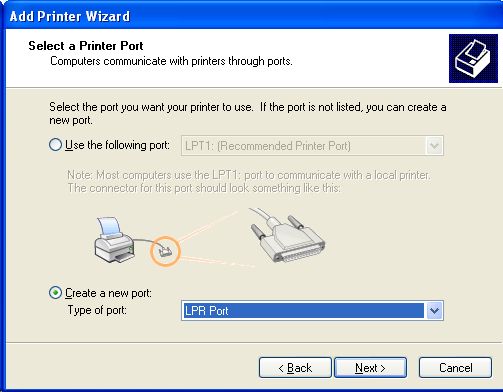
- Select a Printer Port
- Check Creat a new port
- Type of Port: LPR Port
- Next
- Add LPR compatible Printer
- Name or address of server providing lpd: print.cs.uwaterloo.ca
- Name of printer or print queue on that server: lj_csgrad
See list below for additional printers - Next

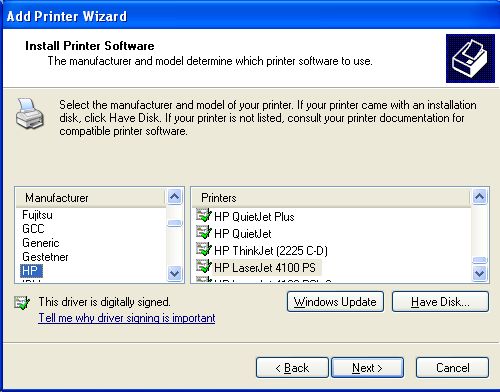
- Install Printer Software (we will use lj_csgrad in this example)
- Manufacture HP
- Printers HP LaserJet 4100 PS (if the HP 4250 does not exist)
- Next
- Keep existing driver if a driver is already is installed
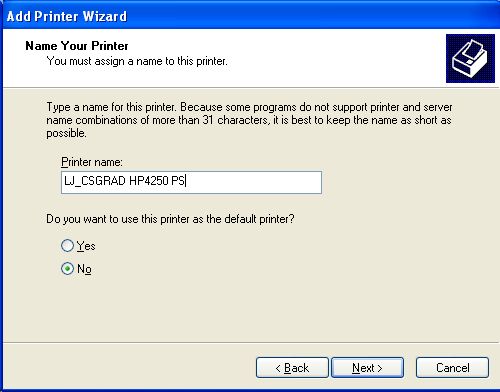
- Name Your Printer
- Printer Name LJ_CSGRAD HP4250 PS - can be any kind of description
- Check if you want this to be your default printer
- Next
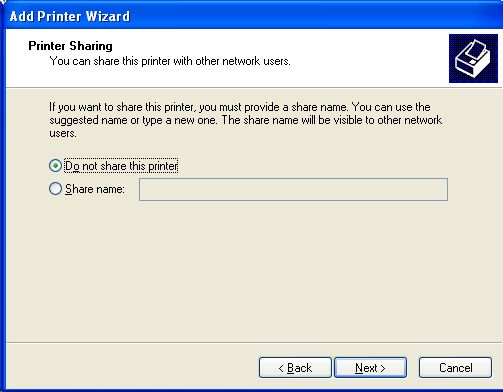
- Printer Sharing
- Do not share thsi printer
- Next
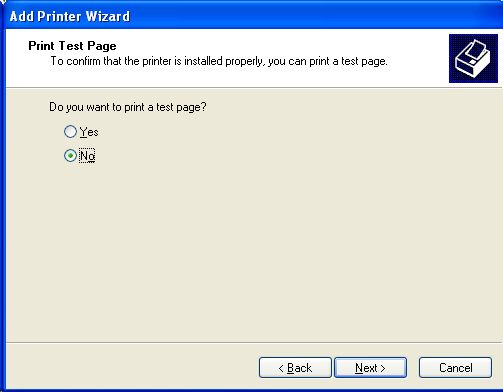
- Print Test Page
- Check Yes if you wish to print a test page
- Next
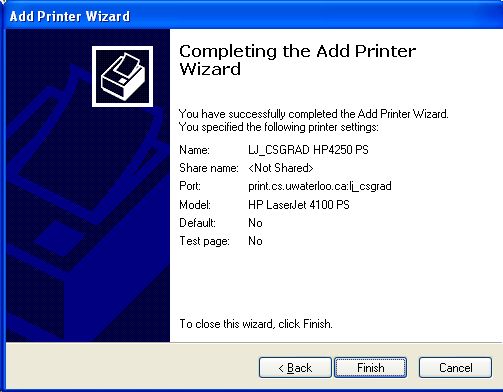
- Completing the Add Printer Wizard
- Finish
Updating Device Settings
Setting Duplex Option to Installed
- Open Printers and Faxes
- Right click on printer and pick Properties
- Open Device Settings
- Update Device Setting to match your target printer
- Example Duplex Installed for two sided printing
Add a Separator page
- Open Printers and Faxes
- Right click on printer and pick Properties
- Open Device Settings
- Click on Advanced Tab
- Click on Separator Page button
- Select "c:\Windows\System32\sysprint.sep"
- Note: if you wish, you can edit sysprint.sep and change "\\\\server\\name" to display the System and user name. Use WordPad or Vim to edit it - Notepad will have problems with the End-of-Line markers
Updating Print Quota to allow that user to print from that machine
- You will need to send a request to accounts@cs to add that user/machinename to the quota file
- CSCF staff may do this themselves using the notes in AddingPrintQuota
Shared CS Printers
For an up-to-date list of shared printers in CS, see the list of printersSaving and restoring printer and driver settings
Print Migrator
- \\asimov.uwaterloo.ca\hardware\PRINTERS\Print_Migrator3.1\printmig.exe
- This tool can save or restore all printer settings and drivers on a computer
CS Printers save with Print Migrator
- \\asimov.uwaterloo.ca\hardware\PRINTERS\Print_Migrator3.1\printers.cab
- This file hase the Common CS printers saved as listed in the previous section
Topic revision: r15 - 2014-10-09 - FraserGunn
Information in this area is meant for use by CSCF staff and is not official documentation, but anybody who is interested is welcome to use it if they find it useful.
- CF Web
- CF Web Home
- Changes
- Index
- Search
- Administration
- Communication
- Hardware
- HelpDeskGuide
- Infrastructure
- InternalProjects
- Linux
- MachineNotes
- Macintosh
- Management
- Networking
- Printing
- Research
- Security
- Software
- Solaris
- StaffStuff
- TaskGroups
- TermGoals
- Teaching
- UserSupport
- Vendors
- Windows
- XHier
- Other Webs
- My links
Ideas, requests, problems regarding TWiki? Send feedback
