TWiki> CF Web>UserSupport>InventorySystemAdministratorDocumentation>InventoryInstallation (2021-12-22, DanielAllen)
 EditAttach
Inventory Installation
- Scope of This Document
- System Description
- Workstation Set-up
- Installing LAMP and Git
- Getting the Inventory Source Code
- Configuring Apache
- Configuring Inventory User Access
- Configuring phpMyAdmin
- Loading the Inventory Databases
- Configuring the Inventory Database
- A Quick Test
- Setup OpenDCIM
- Updating OpenDCIM
- Cleaning Up
- Miscellaneous Notes
- Inventory Tests
- IDE and Debugging Environment Recommendations from Chris Gravel
- See Also
Scope of This Document
This guide explains how to make a developer's working copy of CSCF's Inventory application. It does not include instructions on these related tasks, which are documented elsewhere:- Setting up CAS authentication (only necessary for production; development can use Apache
AuthType basicas detailed below.) - Setting up the php-cgi modules
 .
.
System Description
Inventory is a web-based application built on the LAMPWorkstation Set-up
Someone with sufficient administrative privileges, such as Daniel Allen- A workstation running the same version of Linux as does the production system on our web cluster. At time of this writing, that version is Ubuntu 16.04 LTS. You can download an ISO file here:
http://mirror.cs.uwaterloo.ca/ubuntu-releases/16.04/
- A user account on that workstation with membership in the appropriate groups on the Linux file system.
- It simplifies matters if your Linux user name is the same as your WatIAM user name. To create the user, enter this command in a command window:
sudo adduser username - To add your user to the necessary groups, enter this command in a command window:
sudo usermod -a -G sudo,adm,sambashare,lpadmin username
- It simplifies matters if your Linux user name is the same as your WatIAM user name. To create the user, enter this command in a command window:
- Access to the the campus Git repository. You will need to generate a public key and provide it to a campus Git repository administrator, such as Daniel Allen. Follow the instructions found here.
- Access to the MySQL administrative tool.
sudo apt-get update to update everything you have so far to latest version.
If you get a signature error in the end like:
Reading package lists... Done
W: GPG error: http://download.virtualbox.org/virtualbox/debian xenial InRelease: The following signatures couldn't be verified because the public key is not available: NO_PUBKEY A2F683C52980AECF
W: The repository 'http://download.virtualbox.org/virtualbox/debian xenial InRelease' is not signed.
N: Data from such a repository can't be authenticated and is therefore potentially dangerous to use.
N: See apt-secure(8) manpage for repository creation and user configuration details.
then for Ubuntu 16.04 trywget -q https://www.virtualbox.org/download/oracle_vbox_2016.asc -O- | sudo apt-key add - or for lower Ubuntu versions try
wget -q https://www.virtualbox.org/download/oracle_vbox.asc -O- | sudo apt-key add -
For more info on these, see new key installationInstalling LAMP and Git
Please see PHPSetupGetting the Inventory Source Code
You will create a local instance of the Git repository on the workstation and check out the files from that repository instance to an 'inv' directory directly under the web root directory. The 'inv' directory will hold both the local instance of the repository and the developer's working copy of the application.- Make sure you own the web root directory.
sudo chown -R username:root /var/www/(where username is your user name) - Make sure you have suitable permissions on the web root directory.
sudo chmod -R 755 /var/www/ - Go to the web root directory.
cd /var/www - Clone the repository.
git clone gitlab@git.uwaterloo.ca:cscf/inv
This will:- Create a subdirectory called 'inv'.
- Copy the Git repository into the 'inv' directory as a file called '.git'.
- Check all of the project files out of the local instance of the repository into the 'inv' directory.
-
chmod o+w inv/web/inventory/assetsso yii will be able to write to the generated assets directory.
Configuring Apache
Apache is the program that serves up the HTML documents that make up the Inventory system. It requires a bit of initial configuration. Open the /etc/apache2/apache2.conf file in a text editor and make the following changes.Tips:
- Configuration files are read-only files for regular users like us. You will need to edit them with root permissions like this:
sudo gedit /etc/apache2/apache2.conf - If you're using Ubuntu's default text editor, Gedit, you can invoke the string search feature by entering Ctrl-F (for 'find') to locate a section in the file.
- If you don't find the indicated configuration sections in the
/etc/apache2/apache2.conffile, try looking in the/etc/apache2/sites-available/defaultfile. - To comment out a line in a configuration file, put a "#" at the front of the line.
Allow .htaccess and .htpasswd Files to Control User Access
Locate the following two sections and change the AllowOverride value from None to All.<Directory /> Options FollowSymLinks AllowOverride All Allow from All </Directory>
<Directory /var/www/>
   Options Indexes FollowSymLinks
   AllowOverride All
   Require all granted
</Directory>
<Directory /var/www/inv/>
   AuthType Basic
   AuthName "Inventory"
   AuthUserFile /path/to/.htpasswd
</Directory>
Set the User Under Whose Permissions Apache Runs
Set apache to run as user:- in /etc/apache2/envvars set APACHE_RUN_USER and APACHE_RUN_GROUP to your userid.
- to set the correct permissions, go to /var/www directory and run this command.
sudo chown --recursive username - Reset apache servers.
sudo service apache2 restart - run,
ps aux|grep apache2, to test your changes have worked. There should be one process running as root while the rest run as the newly set userid.
Set the Fully Qualified Server Name
When starting the Apache service, you will get this unhelpful message:Could not reliably determine the servers fully qualified domain name, using 127.0.1.1. Set the 'ServerName' directive globally to suppress this message
To suppress this message, edit the /etc/apache2/apache2.conf file and add these lines to the bottom:
# Suppress start-up error message about server's fully qualified domain name:
ServerName localhost
Enable phpMyAdmin for the Apache Server
Add these lines to the bottom of the/etc/apache2/apache2.conf file:
# Enable phpMyAdmin
Include /etc/phpmyadmin/apache.conf
Restart the Apache Server
To activate the configuration changes, enter this command at the Linux command line:sudo service apache2 restart
All you should see is:
$ sudo service apache2 restart
 * Restarting web server apache2
 ... waiting                                                             [ OK ]
$
If you don't get any messages, then you can confirm that the server has restarted using this command:
sudo service apache2 status Check the last 4 lines to confirm the server has started without any errors or warnings.
Also see the Active row to check if the server was recently started.
Set the Document Root
The directiveDocumentRoot /var/www/ …tells Apache which directory is the document root. Ensure that the directive is set in
/etc/apache2/sites-enabled/000-default
(That file might be a symbolic link to /etc/apache2/sites-available/default.)
Test the Configuration
Create a short, simple HTML document called "test.html" in the/var/www directory and try opening it in your web browser with this URL: http://localhost/test.html
Install the Mod Rewrite Engine
Apache's Mod Rewrite engine catches URLs that meet specific conditions, and rewrites them as it is told to—typically making long, complex URLs in to shorter, more manageable, and more intuitive URLs. Install the engine by entering this command:sudo a2enmod rewrite
Then restart Apache to make the change take effect.
$ sudo a2enmod rewrite
Enabling module rewrite.
To activate the new configuration, you need to run:
  service apache2 restart
$ sudo service apache2 restart
 * Restarting web server apache2
 ... waiting .                                                           [ OK ]
$
Configuring Inventory User Access
The .htpasswd-inv File
When you browse to the Inventory application, you will be asked for a user name and a password. They will be validated against an entry in an encrypted .htpasswd file. It is important for security reasons that the .htpasswd file be located somewhere outside of the web-accessible part of the file system. For development purposes, we'll put it in a subdirectory of your home directory called private. To distinguish it from any other .htpasswd files you might have, we'll call the file .htpasswd-inv. To create the .htpasswd-inv file and put your user name and password in it, enter the following commands, substituting your user name in place of jschmoe. The directory permissions allow Apache to use the directory's files, but prevent unauthorized users from listing the directory's contents. You will be asked to enter a password twice.cd /home/jschmoe mkdir private chmod 711 private htpasswd -c /home/jschmoe/private/.htpasswd-inv jschmoe
Now we need to tell Apache where to find the .htpasswd-inv file when authenticating users. Edit the /etc/apache2/apache2.conf file and in the Directory /var/www/inv/ section, change <path/to/.htpasswd> in the AuthUserFile directive to the location of your .htpasswd-inv file. (The directive might be in the /etc/apache2/sites-available/default file, depending on where you put it in Allow .htaccess and .htpasswd Files to Control User Access, above.)
Example:
<Directory /var/www/inv/>
   AuthType Basic
   AuthName "Inventory"
   AuthUserFile /home/jschmoe/private/.htpasswd-inv
</Directory>
The db-passwords.inc File
In the Inventory application, database access is controlled by a password file called db-password.inc. We will put it in the same private directory as we did the .htpasswd-inv file, above.- Download a db-password.inv template here:
https://cs.uwaterloo.ca/twiki/pub/CF/InventoryInstallation/db-passwords.inc - Create a new text file called db-passwords.inc in your /home/username/private directory and paste the contents of the downloaded file into it.
- Change these two lines:
define('INVENTORY_USER',     '<username>');
define('INVENTORY_PASSWORD', '<password>');
…replacing the user name and password placeholders with your user name and the MySQL administrative password that you chose in step 4 of Installing LAMP, above.
define('INVENTORY_USER',     'jschmoe');
define('INVENTORY_PASSWORD', 'myRea11y$tr0ngPa$$w0rd');
Configuring phpMyAdmin
Create a Database Administrator
In phpMyAdmin, create the user that you will use for regular database manipulation activities (that is, not root), follow these steps.- Browse to http://localhost/phpmyadmin
- Log in.
Username: root
Password: the phpMyAdmin root password that you specified in step 7 of Installing LAMP, above. - Go to the Privileges or User Accounts tab.
- Click the Add a new User link at the bottom of the list of existing users.
- In the Add a new User dialogue, fill in details.
- User name: Enter your WatIAM id.
- Host: Choose Local
- Password: Make up a strong one and write it down. Don't use your WatIAM password. This password could end up in an Apache error log and you want to limit the potential exposure.
- Database for user: None
- Global privlieges: click the Check All link in the section heading to check all of the check boxes.
- Resource limits: Leave them all set at 0 (zero) to impose no resource limits.
- Click the Create User button.
Loading the Inventory Databases
Create the Databases
- Still in phpMyAdmin, go to the Databases tab.
- In the Create new database box, enter
equipment - In the Collation drop-down menu, select
utf8_general_ci - Click the Create button.
- In the Create new database box, enter
rt-math-1 - In the Collation drop-down menu, select
utf8_general_ci
Preparing data for import
If you're loading data NOT from CS's production database, see a sample schema with necessary data attached near the bottom of this page ("inventory.sql"). If you're loading the data from CS's production database, follow the instructions below.- Browse to
cs.uwaterloo.ca/phpMyAdmin - Ask Daniel Allen to log you in with his credentials; or give you permissions on the production database (
GRANT ALL PRIVILEGES ON `equipment`.* TO 'userid'@'%.uwaterloo.ca'; GRANT ALL PRIVILEGES ON `app_opendcim`.* TO 'userid'@'%.uwaterloo.ca';)
- In the drop-down menu of databases in the left pane, select the equipment database.
- Go to the Export tab.
- Choose the Quick export method.
- Select the SQL format.
- Click the Go button and save the equipment.sql file to your browser's download directory. If you're using Firefox, that will be the /home/[username]/Downloads directory. The file will be on the order of 30 MB.
- Repeat the last five steps with the app_opendcim database, saving the app_opendcim.sql file.
- Log out of phpMyAdmin.
Import the Schemata and Data Into the Development Databases
- In a terminal window, go to the directory where you saved the export files.
- Enter the following command, substituting your MySQL username in place of <username>:
mysql -u <username> -p -h localhost equipment <equipment.sql
mysql -u <username> -p -h localhost rt-math-1 <rt-math-1.sql If you do an import of rt-math-1 it may take an hour or more.
Add a User to the Inventory Database
When you use the Inventory application, it will run queries and updates against the database. Those queries and updates require user credentials. You will need to define those credentials by adding a row to the users table in the equipment database. Follow these steps.- Navigate to http://localhost/phpMyAdmin and log in as root, using the phpMyAdmin root password that you chose in step 7 of Installing LAMP, above.
- Go to the Databases tab.
- In the list of databases, click the equipment database.
- Scroll to the bottom of the list of tables and click the users table. The table opens at the Browse tab.
- Go to the Insert tab. A form appears, ready to take values for a new row in the table.
- Leave the Function column alone and enter these values into the fields:
Column Value userid your WatIAM user id expires a date about one year in the future (yyyy-mm-dd) unit "CS" flags "wm" - Click the Go button to add the row.
Configuring the Inventory Database
Define the Location of the Passwords File
Earlier, at The db-passwords.inc File, we put the db-passwords.inc file in a safe, non-web-accessible location. We now need to tell MySQL where to find it.- In the /var/www/inv directory, make a copy of the constants.php.template file in the same folder and call the copy constants.php. Do this either with the Nautilus graphical file manager or with the Linux cp command:
cp /var/www/inv/constants.php.template /var/www/inv/constants.php - Open the constants.php file (not the template!) in a text editor such as gedit.
- Locate a switch($enviro) condition at about line 32 and, for case 0, change the values of the following constants to the values indicated here, with strings enclosed in single quotation marks:
Constant Value 'DEV_PASSWORD_PATH' '/home/<username>/private/db-passwords.inc'
(where <username> is your Linux user name)'SCHOOL_ENVIRONMENT' 'cs''DB_USED' 'LocalHost Database'
Set Some Database Permissions
Set write permission for MySQL on certain directories by running a set-up script.- At the command line, go to the
/var/www/invdirectory. - Enter this command:
. setup
A Quick Test
Just to verify that the system is running:- Restart the Apache web server to ensure that everything is reinitialized:
sudo service apache2 restart - Open a web browser and navigate to
http://localhost/inv. - When asked, enter your WatIAM user name and password. You should see the Inventory search page.
Setup OpenDCIM
OpenDCIM is used for the server room inventory mapping which is now built into inventory. See the InventoryFields page for basic details about OpenDCIM. While it is not required to use inventory, it is a feature of inventory and should be installed with inventory. To install OpenDCIM you'll need to follow the instructions included on the git repo we have for OpenDCIM. You can find the repository at https://git.uwaterloo.ca/cscf/open-dcimUpdating OpenDCIM
The way in which we are storing OpenDCIM has some pros and cons. It is very easy to deploy OpenDCIM as it is all stored in a git repo that can easily be cloned and used. A con though is that updating is slightly more work as our files are mixed in with the core OpenDCIM files. Overall, we minimize differences with the core code; however we have some added files for the API, as well as a few class files that are modified to add additional functionality for the API. We have a custom_auth.php file that handles authentication, and the main db.inc.php file was modified to "require" our passwords file and the custom auth file. It is still possible though to update without too much pain since git is very good at dealing with these kinds of situations. Git allows us to have "remotes" for one git repo. I will outline the steps below of how to update. For these steps I assume you are already cd'ed into the OpenDCIM directory. Add in a new git remote that goes to the OpenDCIM Github repo:git remote add dev https://github.com/samilliken/openDCIM.git #
Great, now if we did a git pull dev master we would be able to grab all of OpenDCIM's changes. However this will cause a lot of merge conflicts. I suggest trying out git pull dev master and seeing if you can resolve the conflicts. Another option is to just tell git to use all of the OpenDCIM files as the "correct" files to use in the case of a merge conflict, however this could overwrite some of our custom changes. However if this is not a concern the command below will accomplish this:
git pull -s recursive -X theirs dev master
The above command essentially does the normal pull, but in the case of merge conflicts it uses OpenDCIM's repo from Github as the authoritative one and resolves the merge conflicts by using their changes. But again, be careful as this could overwrite some of our changes we made to the OpenDCIM files so you cannot always use this command.
If you have any problems where git is complaining that you have untracked or uncommitted files then you will need to deal with these for the git pull to work. In my case there were a lot of locale files that were causing issues. You will need to figure out on your own the resolutions to the problems that occur, just make sure you deal appropriately with the db.config.inc file as this file may appear in a list of untracked files, but be a required file as it stores your database config settings.
Due to how this git pull works you may end up with the install file added back into your set of files which may cause OpenDCIM to keep redirecting to the installer. You'll need to delete the install file via:
rm -f install.php
At this point you should be all updated code wise, however there is one more step. Your database is likely using an out of date schema now. OpenDCIM is a little odd for how they handle updating the database to the new versions. They have an SQL file that is used to convert every version to the next one. Take a look at the sql files to see what I mean:
ls db*.sql
You'll notice a lot of files. How do you know which SQL changes to apply? Simple. If you are upgrading from version 4.2 to version 4.3 I would run the SQL commands in the db-4.2-to-4.3.sql file on the database. Now if you upgraded through multiple versions you'll need to run in order through all of the files. So if I was going from 4.2 to 4.4 I would need to run the migrations from 4.2 to 4.3 and then 4.3 to 4.4.
Once you've applied these SQL changes you should be ready to use OpenDCIM with the new version. I suggest with the database updates you make a backup of the database prior to making the SQL changes, just in case. Also once done all the updating it is a good idea to verify that OpenDCIM is working properly and that all of the API is working properly in inventory.
Cleaning Up
Use the following commands to do a little housekeeping.| Command | Function |
|---|---|
| sudo apt-get clean | Clean up the apt cache |
| sudo apt-get update | Update the package index with the latest changes in repositories |
| sudo apt-get autoremove | Remove packages that were automatically installed to satisfy dependencies but are no longer needed |
Miscellaneous Notes
- The location of the PHP.ini file is: /etc/php5/apache2/php.ini.
- The location of the Apache error log is: /var/log/apache2/error.log.
- The location of the Apache config file is: /etc/apache2/apache2.conf, though some configurations may instead be in /etc/apache2/sites-available/default.
- The web server's root directory is: /var/www.
- The Inventory application's root directory is: /var/www/inv.
- The Yii framework used is version 1.1. You can downloaded it from here: http://www.yiiframework.com/download/#yii1.
- To get more information about your PHP configuration than you could ever want, make a file called phpinfo.php in /var/www/ and put this line in the body:
<?php phpinfo(); ?>
Then open the file in your web browser at http://localhost/phpinfo.php.
- The php-cgi module has not been installed. It is installed and running on the production server, but is not required for development purposes.
Inventory Tests
Testing of the inventory application is very important. We have automated tests using selenium that test the application. Any new features or changes in the functionality of a feature requires new tests or modification of old tests. They must be regularly tested to make sure there are no bugs in the application.To install selenium and other requirements as well as examples of how to write tests, go to InventoryDeveloperTestPlan.
IDE and Debugging Environment Recommendations from Chris Gravel
Sublime
- Use sublime editor for Ubuntu for an excellent and highly customizable text editor. (Installation instructions here: http://askubuntu.com/questions/172698/how-do-i-install-sublime-text-2-3).
- Install package control from here: https://packagecontrol.io/installation
- Setup XDebug for Sublime editor to have a live PHP debugging environment.
- Follow XDebug instructions here: http://www.sitepoint.com/debugging-xdebug-sublime-text-3/
- Once enabled, you just need to start an XDebugging session in Sublime and then include the line "?XDEBUG_SESSION_START=sublime.xdebug" after the URL address of your page.
- There is an error in the default setup of XDebug in Linux which can easily be fixed. To fix it, first open Sublime editor and after installing Xdebug as described above, click on Tools > Xdebug > Settings - default (notice this document is not editable). Now select everything, copy it and paste it into a new document on your desktop titled "Xdebug.sublime-settings". Now create the directory "~/.config/sublime-text-3/Packages/Xdebug Client" and move the created file into there so its full path is "~/.config/sublime-text-3/Packages/Xdebug Client/Xdebug.sublime-settings". Now you can edit settings by going into Sublime editor and then Tools > Xdebug > Settings - default and then editing the settings accordingly followed by saving the changes. I suggest immediately changing the "max_depth" value to 3 in order to view nested arrays. That's it.
Meld
- For an excellent diff viewer install meld--extremely useful when performing merges.
- sudo apt-get install meld
Lint
- For Linting with Sublime on Ubuntu, do the following:
- Install Sublime Linter with package control (ctrl+shift+p)
- Install Sublime Linter php extension with package control
- Install the following Linux packages
-
sudo apt-get install nodejs-legacy -
sudo apt-get install npm -
sudo npm install -g jshint -
sudo npm install -g csslint
-
- Add this to the sublimelinter package settings. Preferences - Package Settings - SublimeLinter - Settings_User
"paths": {
    "linux": [
        "/usr/local/lib/node_modules/jshint/bin",
        "/usr/local/lib/node_modules/csslint/bin",
        "/usr/bin/php -l"
    ],
    "osx": [],
    "windows": []
}
SSH
You will be using the command-line tool ssh to connect to other linux machines, such as linux.cs.uwaterloo.ca, which mounts the shared directories where our production web files are stored. You can find an intro to SSH here.See Also


| I | Attachment | History | Action | Size | Date | Who | Comment |
|---|---|---|---|---|---|---|---|
| |
ChooseDatabase.png | r1 | manage | 28.6 K | 2015-11-30 - 11:54 | JeffGuild | Screen shot: choosing a database for myPhpAdmin |
| |
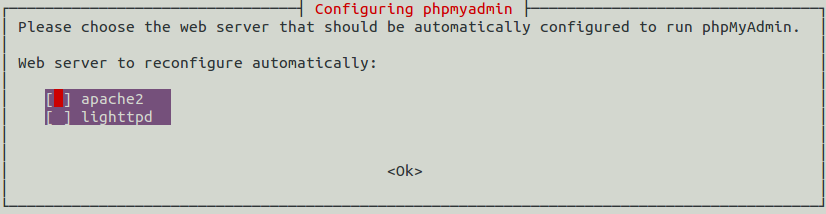
ChooseWebServer.png | r2 r1 | manage | 13.8 K | 2015-11-30 - 11:46 | JeffGuild | Screen shot: choosing a web server to run phpMyAdmin |
| |
db-passwords.inc | r4 r3 r2 r1 | manage | 1.1 K | 2021-02-25 - 15:42 | BrianJiang | template password file - not included in repository. |
| |
inventory.sql | r2 r1 | manage | 104.7 K | 2021-02-23 - 10:18 | BrianJiang | Sample schema with necessary data inserted. |
Topic revision: r70 - 2021-12-22 - DanielAllen
Information in this area is meant for use by CSCF staff and is not official documentation, but anybody who is interested is welcome to use it if they find it useful.
- CF Web
- CF Web Home
- Changes
- Index
- Search
- Administration
- Communication
- Hardware
- HelpDeskGuide
- Infrastructure
- InternalProjects
- Linux
- MachineNotes
- Macintosh
- Management
- Networking
- Printing
- Research
- Security
- Software
- Solaris
- StaffStuff
- TaskGroups
- TermGoals
- Teaching
- UserSupport
- Vendors
- Windows
- XHier
- Other Webs
- My links
 |
|
Ideas, requests, problems regarding TWiki? Send feedback