Editor
An “editor” manipulates text without any formatting. This is different from a “word processor” like Microsoft Word that manipulates text and adds formatting (titles, font changes, etc). For this task we need an editor. Any editor will work; however, we’re assuming the Virtual Studio Code editor (VS Code).
Using the editor
 Once you’ve changed to the
 oat-plandefs directory, you’ll probably want to open the plan
definition files you’ll be working on. You can open ALL of them with the command code uw.
That opens the editor with a directory tree on the left that allows you to access individual files:
You probably don’t want or need to access the whole directory structure. So
use code uw/u/math (for the Math Faculty – choose yours).
Recall the result of printing only the include specifications:
oat3 test: degreeAudit --transcript transcripts/math/bac/statactsc/stats/biostath-1219-4b.json --pprint includesOnly
block {
# /Users/oat3/oat/oat-plandefs/uw/u/math/baseCourseDefs-1219.plan
include(baseCourseDefs,
1219,
uw.u.math.bac.statactsc.stats,
uw.u.math.bac.statactsc.stats, uw.u.math, uw.u)
# /Users/oat3/oat/oat-plandefs/uw/u/baseCourseDefs-1109.plan
include(baseCourseDefs, uw.u)
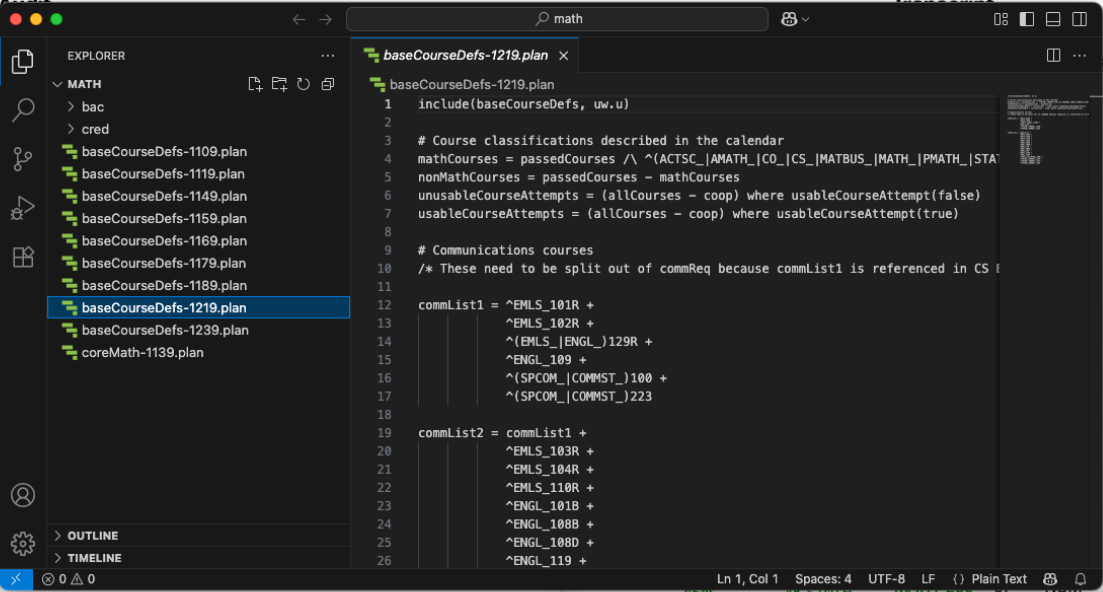
...On the left side of the editor, navigate to oat-plandefs/uw/u/math/baseCourseDefs-1219.plan. If you opened the
editor with code uw/u/math (from the oat-plandefs directory), it will be right on the top level. Click it’s name:
Finally, at last, we’re getting to actual plan definitions.
As of 2025-06-22, this is as far as the tutorial goes. Suggested next steps:
- Go to a live training session.
- Wait for Byron to fill in more details.
- Explore! Compare what you see with the documentation in Plan Def Details.