How to Use RIPPLE
This guide explains how to connect to the CrySP RIPPLE compute facility via ssh. The second part of the guide describes how to connect to a remote runtime (i.e. a remote Python interpreter) via PyCharm. Furthermore, we show how to connect to a Jupyter notebook hosted on the remote machine.Setup RIPPLE
You have to generate an ssh public and private key and send only the public key to Ian Goldberg. Make sure to put both keys into the "~/.ssh/" folder of your Linux machine. In this tutorial, we assume you named the secret and public key id_rsa and id_rsa.pub. The RIPPLE booking site: https://ripple.uwaterloo.ca/booking/Web/dashboard.phpThe following part of the tutorial makes it easier for you to connect to the machines, i.e. by just typing "ssh grunt6" instead of all the rest and how to do port forwarding. Notation: [USER]: Your username [MACHINE]: The machine name, i.e. "grunt1" [JUMP]: The jump server static IP address [PORT_R]: A port number for a remote machine [PORT_L]: A port number for a local machine
Connect to RIPPLE directly
RIPPLE can only be accessed through a computer with a static IP that has been whitelisted. This could be the student server "linux.student.cs.uwaterloo.ca" if you are not from CrySP or if you do not have a computer with a static IP. After booking a machine through the booking facility you can connect via ssh to the server by connecting to "[MACHINE].cs.uwaterloo.ca".Connect to RIPPLE through a Jump Server
Often times you want to connect to RIPPLE via a third device like your laptop or from home. For these cases, you need to establish a tunnel through a so called jump server, which is a whitelisted device like your desktop computer in the lab. If you are not from CrySP you want to connect through the student server with hostname [JUMP]="linux.student.cs.uwaterloo.ca".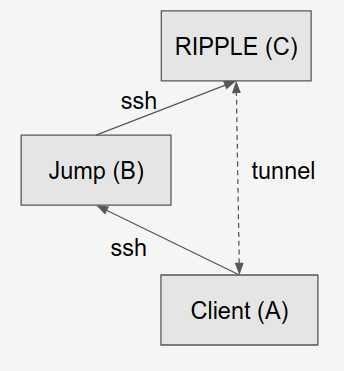 The easiest way is to ssh into the jump server and from there ssh into the RIPPLE computer.
You can automate that by adding the following entry to your "/.ssh/config" file.
Host jump
HostName [JUMP]
User [USER]
Host [MACHINE]
HostName [MACHINE].cs.uwaterloo.ca
User [USER]
IdentityFile ~/.ssh/id_rsa
ProxyCommand ssh -q -W %h:%p jump
Now you can connect to the remote machine (C) from your local machine (A) via "ssh [MACHINE]"
The easiest way is to ssh into the jump server and from there ssh into the RIPPLE computer.
You can automate that by adding the following entry to your "/.ssh/config" file.
Host jump
HostName [JUMP]
User [USER]
Host [MACHINE]
HostName [MACHINE].cs.uwaterloo.ca
User [USER]
IdentityFile ~/.ssh/id_rsa
ProxyCommand ssh -q -W %h:%p jump
Now you can connect to the remote machine (C) from your local machine (A) via "ssh [MACHINE]"
Connect your Applications to RIPPLE
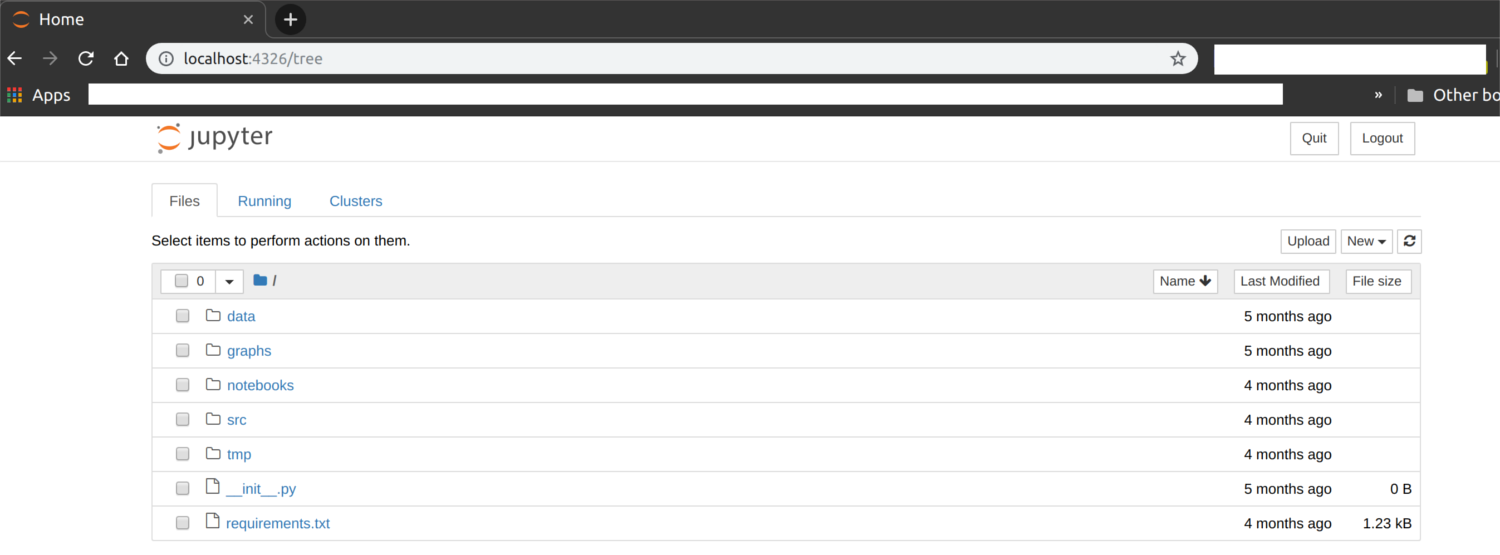
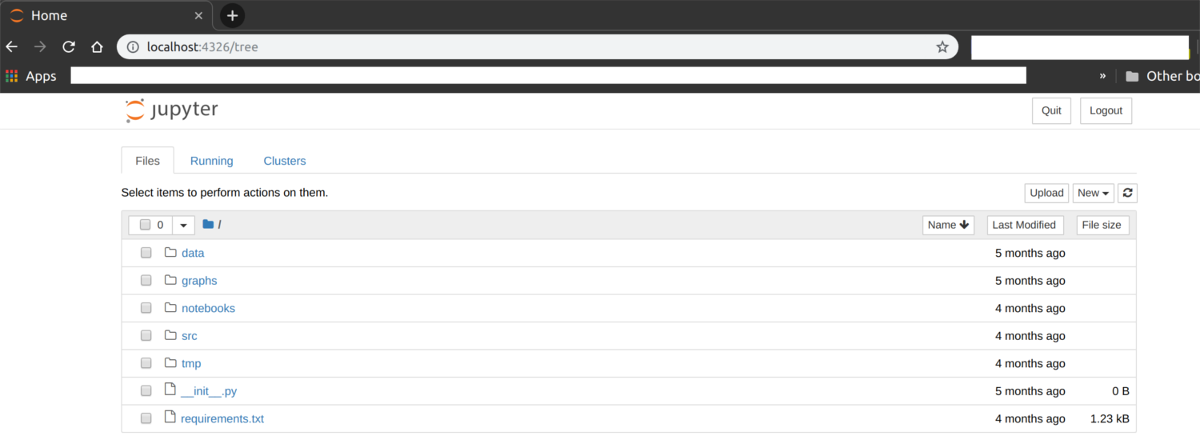
We assume you can now successfully ssh into your RIPPLE machine. The next task is to add features to your deployment that simplify development and testing for you. We showcase how to connect the Python IDE PyCharm to Ripple and how to set it up so that files are automatically synced via SFTP. Additionally, we deploy a jupyter notebook which we connect to from our local host (client A in the picture above). For the deployment above, we only have to add the statement that the tunnel should also forward a certain port from the remote machine (C) to our local machine (A). For this, go into your "~/.ssh/config" file and adjust the previously made entry as following. Host [MACHINE] HostName [MACHINE].cs.uwaterloo.ca User [USER] ForwardAgent yes LocalForward [PORT_R] localhost:[PORT_L] IdentityFile ~/.ssh/id_rsa ProxyCommand ssh -q -W %h:%p jump When you now ssh into the machine, make sure to keep the connection open because the tunnel only exists as long as your ssh connection is alive. Now, you can host any application on the remote machine (C) to the remote port and can connect to it on your local machine (A) on "localhost:[PORT_L]". For example, to deploy a jupyter notebook on port [PORT_R]=4321 on the remote machine (C) you would issue the command jupyter notebook --port=4321 and then go to your local machine (A) and enter "localhost:[PORT_L]" into the browser. The professional edition of PyCharm (freely available to students) allows to add a Python interpreter via ssh that is located on the remote computer.
However, it does not feature connecting to one via a jump server. Thus, we build a tunnel to RIPPLE that locally binds a certain remote port (i.e. 6000 in this case) to a port on our local machine that we can reach through localhost.
To establish such a port binding, issue the following command on your local machine (Client A) and make sure to leave the terminal open.
ssh -L 6000:localhost:22 [MACHINE]
Then, go into PyCharm->Settings->Project->Python Interpreter, the add a new environment by clicking on the little gear symbol->Add.
A window will pop up and you can select "SSH Interpreter" with preselected "new configuration".
Enter as hostname "localhost", port 6000 your username and then connect.
If successful, another window will pop-up where you have to enter the remote location of the Python executable that you want to choose as your interpreter.
If you have Anaconda or virtualenv installed (which is highly recommended), then enter the path to that Python executable, otherwise just enter the global Python at"/usr/bin/python" and finish the dialog.
We still have to define a deployment option so that PyCharm automatically synchronizes the files necessary to run the program.
For this, go into PyCharm->Settings->Build, Execution, Deployment->Deployment and define the desired path mappings and which files should be synced.
Once you set this deployment option to default, it should automatically sync the files before you hit "run" on your python programs.
Also, you can install Python packages on the remote machine via PyCharm.
Congratulations, now you can run code remotely on the RIPPLE machine while coding on your laptop.
The professional edition of PyCharm (freely available to students) allows to add a Python interpreter via ssh that is located on the remote computer.
However, it does not feature connecting to one via a jump server. Thus, we build a tunnel to RIPPLE that locally binds a certain remote port (i.e. 6000 in this case) to a port on our local machine that we can reach through localhost.
To establish such a port binding, issue the following command on your local machine (Client A) and make sure to leave the terminal open.
ssh -L 6000:localhost:22 [MACHINE]
Then, go into PyCharm->Settings->Project->Python Interpreter, the add a new environment by clicking on the little gear symbol->Add.
A window will pop up and you can select "SSH Interpreter" with preselected "new configuration".
Enter as hostname "localhost", port 6000 your username and then connect.
If successful, another window will pop-up where you have to enter the remote location of the Python executable that you want to choose as your interpreter.
If you have Anaconda or virtualenv installed (which is highly recommended), then enter the path to that Python executable, otherwise just enter the global Python at"/usr/bin/python" and finish the dialog.
We still have to define a deployment option so that PyCharm automatically synchronizes the files necessary to run the program.
For this, go into PyCharm->Settings->Build, Execution, Deployment->Deployment and define the desired path mappings and which files should be synced.
Once you set this deployment option to default, it should automatically sync the files before you hit "run" on your python programs.
Also, you can install Python packages on the remote machine via PyCharm.
Congratulations, now you can run code remotely on the RIPPLE machine while coding on your laptop. 

| I | Attachment | History | Action | Size | Date | Who | Comment |
|---|---|---|---|---|---|---|---|
| |
jupyter.png | r1 | manage | 148.6 K | 2019-09-27 - 17:20 | NilsLukas | Result screen to connect with jupyter |
| |
jupyter2.png | r1 | manage | 25.2 K | 2019-09-27 - 17:21 | NilsLukas | Connection to Jupyter is successful |
| |
jupyter3.png | r1 | manage | 13.1 K | 2019-09-27 - 17:22 | NilsLukas | |
| |
jupyter4.png | r1 | manage | 54.4 K | 2019-09-27 - 17:24 | NilsLukas | Successful connection to Jupyter |
| |
jupyter5.png | r1 | manage | 13.1 K | 2019-09-27 - 17:24 | NilsLukas | Connection to Jupyter is successful |
| |
jupyter6.png | r1 | manage | 84.3 K | 2019-09-27 - 17:26 | NilsLukas | Successful connection to Jupyter |
| |
jupyter7.png | r1 | manage | 65.2 K | 2019-09-27 - 17:27 | NilsLukas | Successful connection to Jupyter |
| |
jupyter8.png | r1 | manage | 38.4 K | 2019-09-27 - 17:28 | NilsLukas | Successful connection to Jupyter |
| |
ripple.png | r2 r1 | manage | 15.6 K | 2019-09-27 - 14:23 | NilsLukas | Desired method of connecting to RIPPLE through a jump server. |
| |
ripple2.png | r1 | manage | 15.6 K | 2019-09-27 - 14:24 | NilsLukas | Desired method of connecting to RIPPLE through a jump server. |
|
|
Ideas, requests, problems regarding TWiki? Send feedback