Making a Samsung liveable Netbook
- Making a Samsung liveable Netbook
- Install wubi Ubuntu
- After Installation
- Default swapspace tends to be too small
- Make Bootloader default to Ubuntu
- Change Ubuntu Window Manager to Desktop version
- Set a more local mirror, probably mirror.csclub.uwaterloo.ca
- Install extra applications
- Cloning booting and running a wubicopy
- Saga Continues; Becomes time to Upgrade to 12.04
- To Connect to eduroam under ubuntu
- Bogus eduroam networks
- Images Used to Create a Cleaner Tutorial
Install wubi Ubuntu
- http://www.ubuntu.com/netbook/get-ubuntu/download

- http://www.ubuntu.com/desktop/get-ubuntu/windows-installer

After Installation
Default swapspace tends to be too small
Help at wiki.ubuntu.com% sudo su # swapoff -a # cd /host/ubuntu/disks/ # mv swap.disk swap.disk.bak # dd if=/dev/zero of=swap.disk bs=1024 count=2097152 # mkswap swap.disk # swapon -a # free -m #But I like to do something like...
   # mkdir -p /host/ubuntu-common/disks/
   # cd /host/ubuntu-common/disks/
   # dd if=/dev/zero of=swap.disk bs=1024 count=4194304
   # mkswap swap.disk
And then modify /etc/fstab to use that swapspace.
   % diff /etc/fstab.bak /etc/fstab
   10c10,11
   < /host/ubuntu/disks/swap.disk none            swap    loop,sw         0       0
   ---
   > #/host/ubuntu/disks/swap.disk none            swap    loop,sw         0       0
   > /host/ubuntu-common/disks/swap.disk none      swap    loop,sw         0       0
   %
That one large swapfile can be used by multiple installations (since they don't run concurrently). Later I also create
/host/ubuntu-common/disks/home.disk for use by mulitple installations.
Or for convenience when upgrading.
Make Bootloader default to Ubuntu
The Windows 7 bootloader is actually easy enough to work with that I forgot to make notes the first time. There is a GUI- decribed at www.sevenforums.com

- decribed at www.sevenforums.com

- also some bloggish place

C:> bcdedit /export savefilename
to export settings (in an unreadable Registry format). You can restore
by:
C:> bcdedit /import savefilename
C:> bcdedit
dumps current settings in readable form.
C:> bcdedit /default {... cut/paste identifier of ubuntu section ...}
causes the default O/S to be ubuntu.
Also useful and easy is something like
C:> bcdedit /timeout 4
To set the timeout to 4 seconds.
Change Ubuntu Window Manager to Desktop version
Set a more local mirror, probably mirror.csclub.uwaterloo.ca
You need to find[System]
....[Adminstration]
........[Synaptic Package Manager] Then... [Settings] ....[Repositories] Select [Other] from the menu, which will allow choosing, including a button to test and select the best server. mirror.csclub.uwaterloo.ca tends to be a good choice in and around uwaterloo.ca.
Install extra applications
"Server" applications
openssh-server
Stuff
imagemagick (display) (or graphicsmagick, sigh)
csh ? tcsh ?
lynx
traceroute or traceroute-nanog
mailutils
mbr
rcs
rdist
sshfs
vice
vlc
cheese (webcam support)
12.04 Things on 12.04 LiveCD, but not in resulting installation
gparted
12.04 Extras
gnome-session-fallback **
Cloning booting and running a wubicopy
Saga Continues; Becomes time to Upgrade to 12.04
To Connect to eduroam under ubuntu
Select the radiating waves wireless icon...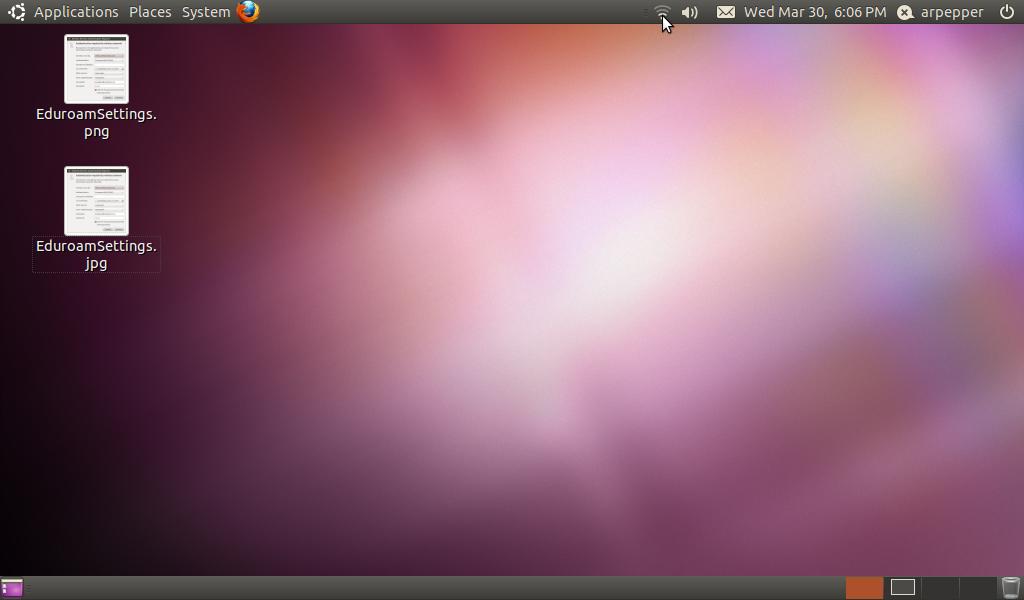 You should see a selection of wireless networks available.
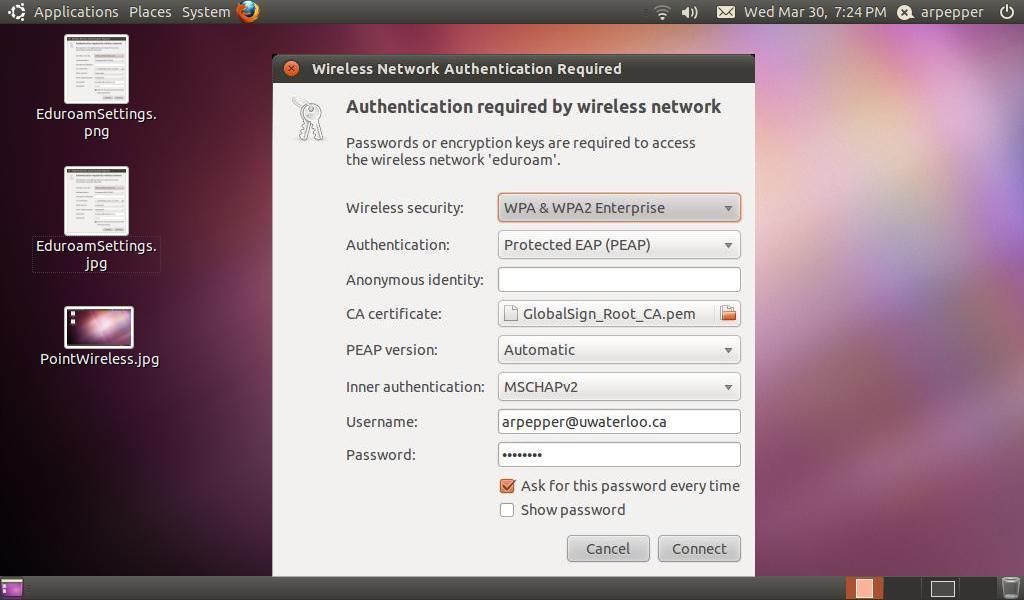
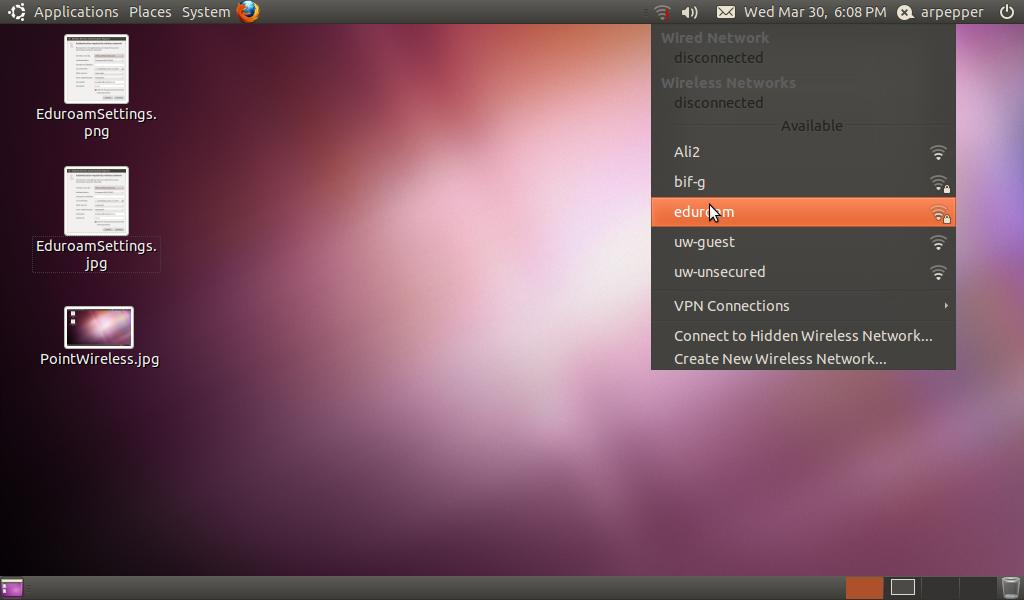 Note the padlock on eduroam. Choosing eduroam should present you
with the following dialog box. (If not, exit fast).
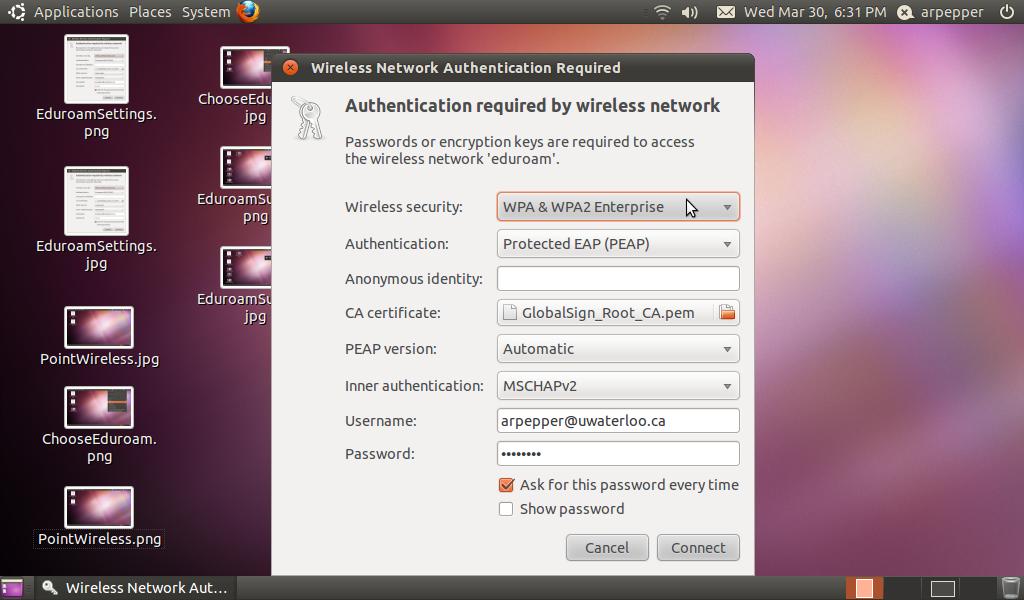
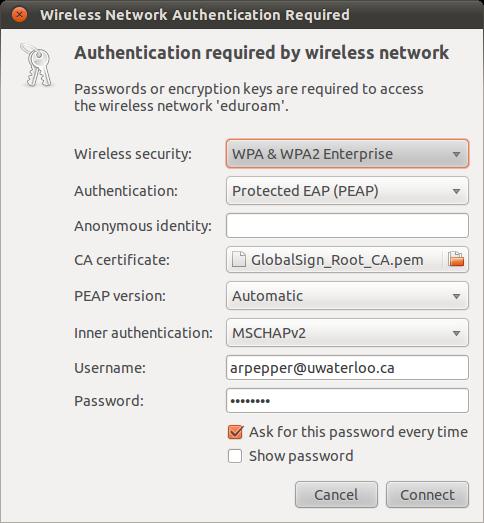
Notes:
- Some choices come up like that; some (PEAP) must be chosen
- Username most include @institution

- GlobalSign_Root_CA.pem can be found by browsing to /etc/ssl/certs.
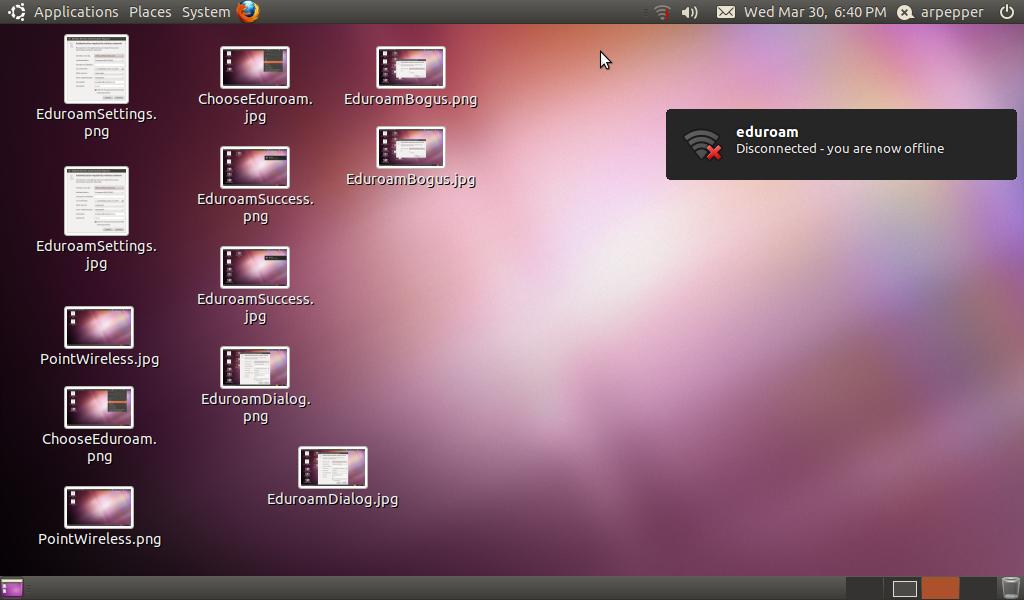
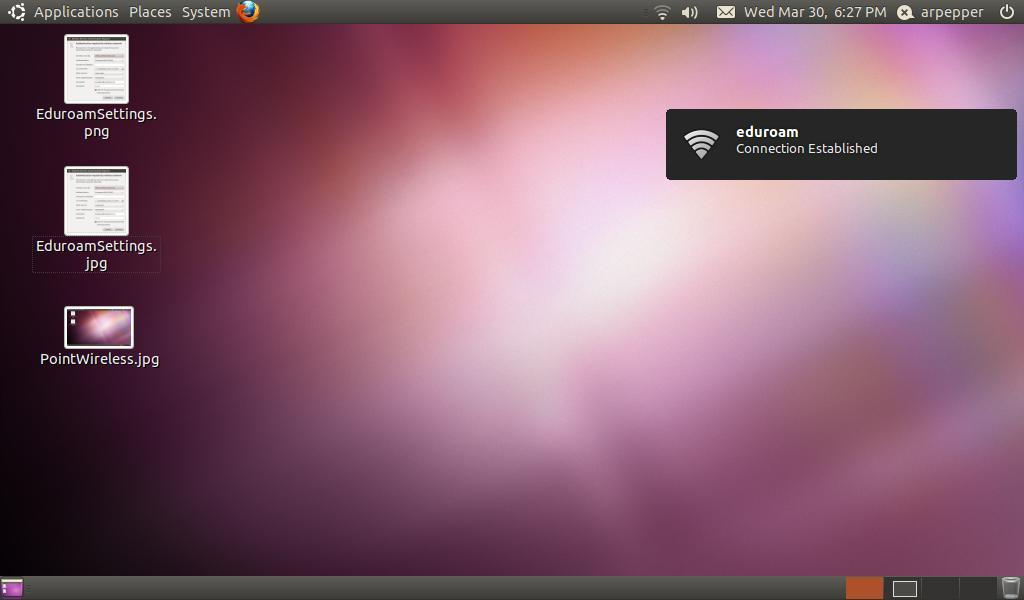
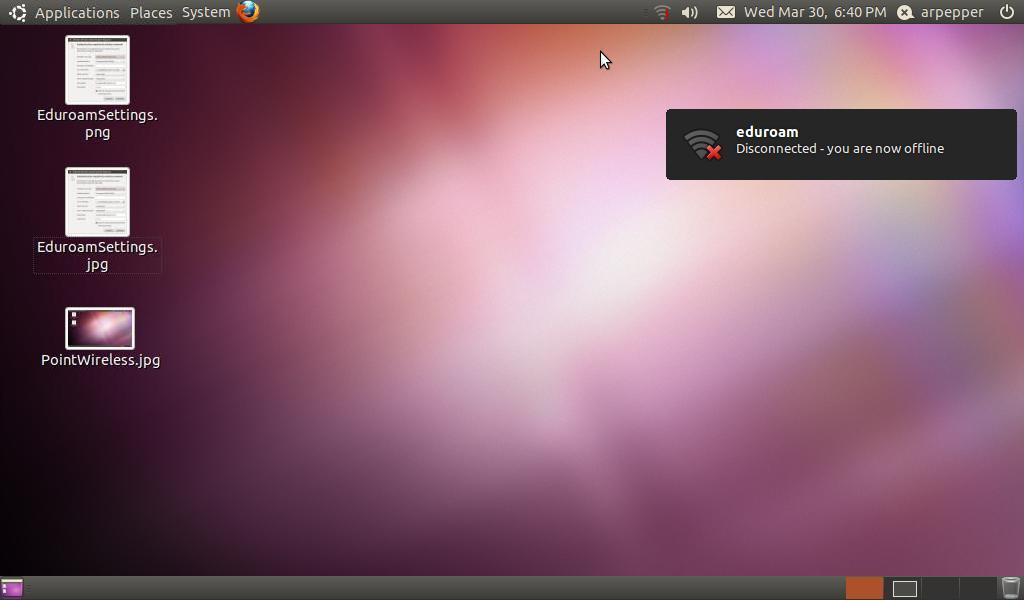
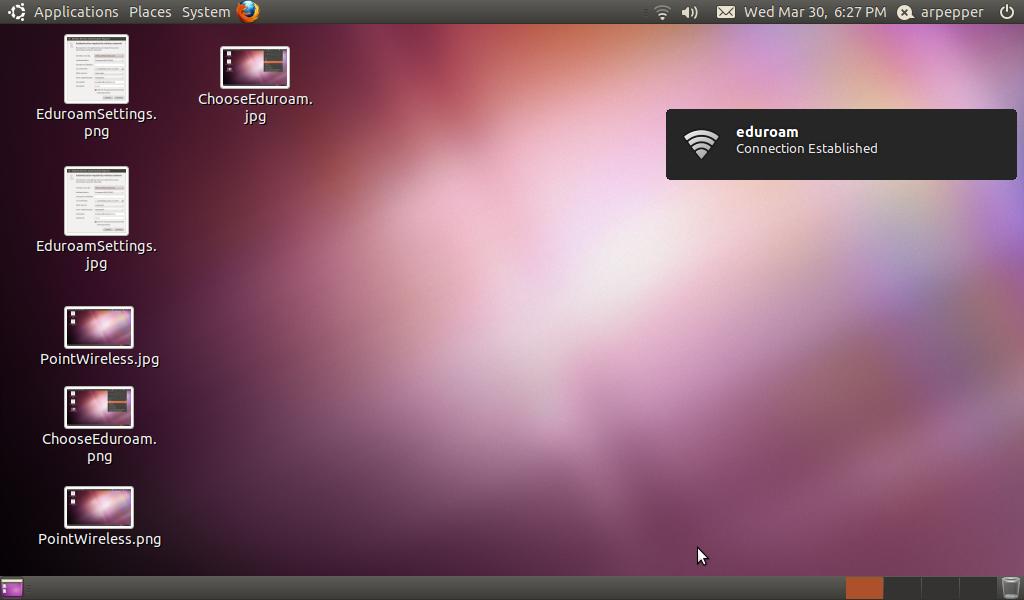 If you deliberately disconnect, or if the network disconnects you, you will probably see...
Bogus eduroam networks
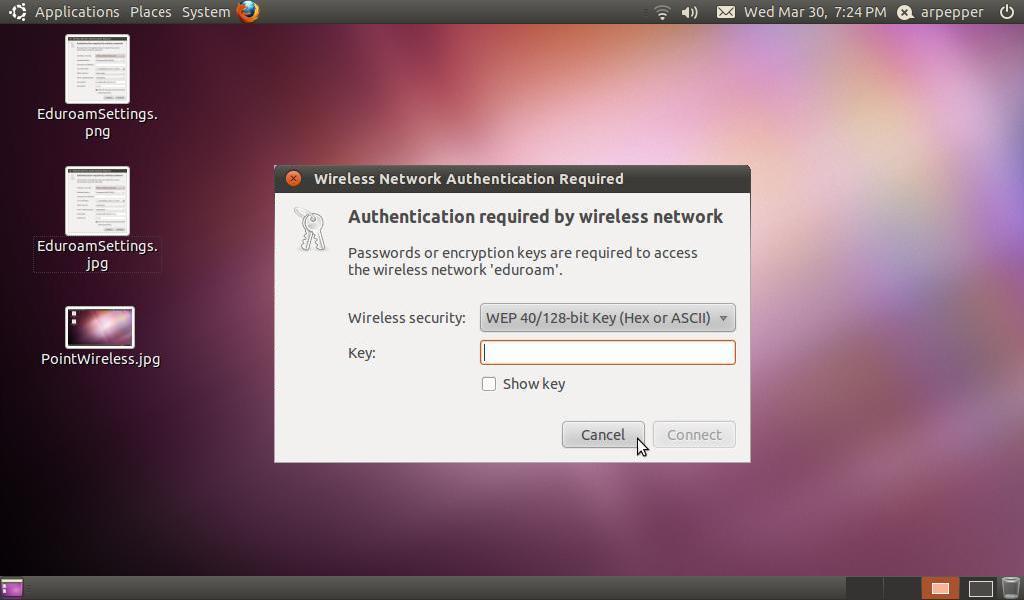
Here's a bogus eduroam network I actually encountered while generating the screenshots.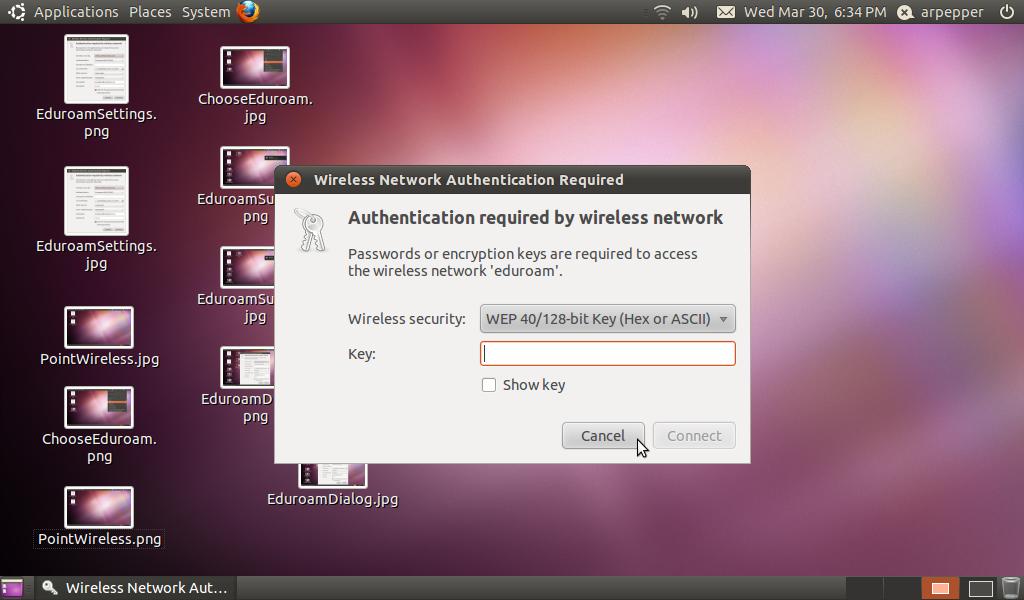 It's remotely possible this is a deliberate attempt to snarf authentication
information, but, more likely people accidentally create a Network
when they intended to create a Network Definition.
-- AdrianPepper - 14 Feb 2012
Images Used to Create a Cleaner Tutorial
I edited the above images with the following to produce LinuxWirelessUWTutorial .- Desktop.jpg
-
- EduroamDialog2.jpg
-
- EduroamSuccess2.jpg
-
- EduroamDisconnect2.jpg
-
- EduroamBogus2.jpg
-
- WirelessIcon.jpg
-

| I | Attachment | History | Action | Size | Date | Who | Comment |
|---|---|---|---|---|---|---|---|
| |
ChooseEduroam.jpg | r1 | manage | 39.2 K | 2011-03-30 - 18:17 | AdrianPepper | |
| |
Desktop.jpg | r1 | manage | 23.3 K | 2011-03-30 - 19:26 | AdrianPepper | |
| |
EduroamBogus.jpg | r1 | manage | 60.0 K | 2011-03-30 - 18:58 | AdrianPepper | |
| |
EduroamBogus2.jpg | r1 | manage | 46.6 K | 2011-03-31 - 08:38 | AdrianPepper | |
| |
EduroamDialog.jpg | r1 | manage | 70.3 K | 2011-03-30 - 18:57 | AdrianPepper | |
| |
EduroamDialog2.jpg | r1 | manage | 61.2 K | 2011-03-31 - 08:35 | AdrianPepper | |
| |
EduroamDisconnect.jpg | r1 | manage | 51.8 K | 2011-03-30 - 18:59 | AdrianPepper | |
| |
EduroamDisconnect2.jpg | r1 | manage | 33.9 K | 2011-03-31 - 08:37 | AdrianPepper | |
| |
EduroamSettings.jpg | r1 | manage | 37.1 K | 2011-03-30 - 17:42 | AdrianPepper | |
| |
EduroamSuccess.jpg | r1 | manage | 39.0 K | 2011-03-30 - 18:58 | AdrianPepper | |
| |
EduroamSuccess2.jpg | r1 | manage | 33.1 K | 2011-03-31 - 08:36 | AdrianPepper | |
| |
PointWireless.jpg | r1 | manage | 28.6 K | 2011-03-30 - 18:17 | AdrianPepper | |
| |
WirelessIcon.jpg | r1 | manage | 1.8 K | 2011-03-31 - 08:40 | AdrianPepper |
Topic revision: r16 - 2013-05-30 - AdrianPepper
Ideas, requests, problems regarding TWiki? Send feedback


