The following examples demonstrate typical VLAN configurations for the switch using the web interface.
![]() Example
1 - Simple two-group VLAN setup
Example
1 - Simple two-group VLAN setup
![]() Example
2 - Elaborate setup
Example
2 - Elaborate setup
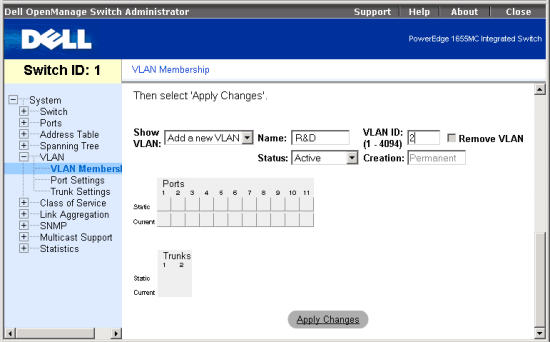
This example steps through a simple two-group VLAN setup.
1. In the VLAN Membership page, select Add a new
VLAN from the Show VLAN drop-down list.
2. In the Name box, type the symbolic name R&D to represent the new VLAN.
In the VLAN ID box, type the ID value of 2 for the new VLAN. Then click Apply
Changes to create the new VLAN.
3. In the VLAN Membership page, select VLAN 2 from the Show VLAN drop-down list. Because there are no ports currently in the new VLAN, all the port and trunk toggle buttons are blank. Click the toggle buttons in the Static row under the port/trunk numbers to select the desired port members of the new VLAN. Then click Apply Changes to confirm the settings.
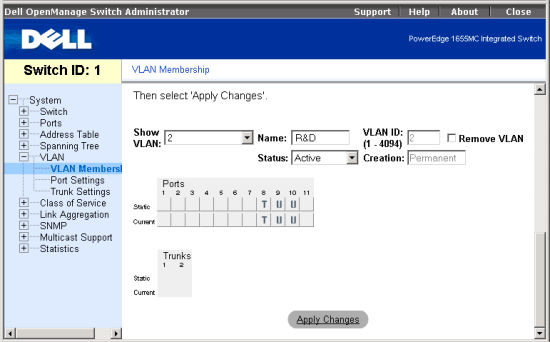
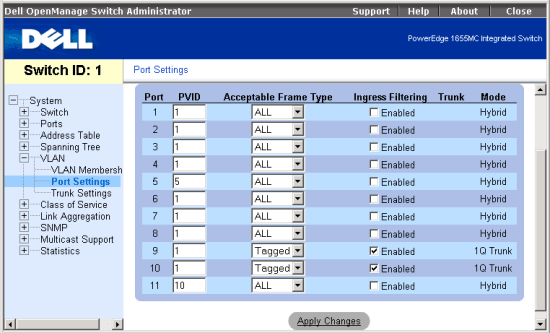
4. Open the the VLAN, Port Settings page. To accept only tagged packets on Port 8, set Acceptable Frame Types to Tagged and enable Ingress Filtering. To allow untagged packets to be used in the new VLAN on Ports 9 and 10, change the Port VLAN IDs to VLAN 2 and leave Acceptable Frame Types set to All.
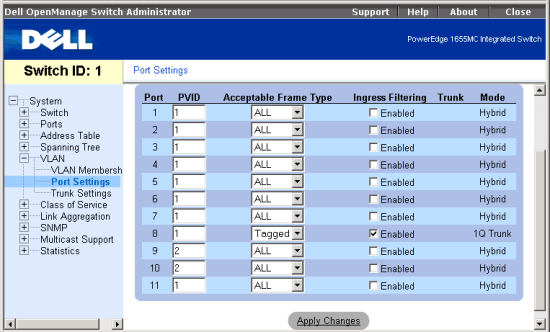
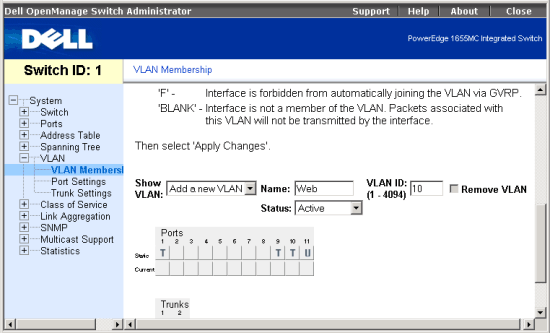
This example steps through a more elaborate setup illustrating possible scenarios for a comprehensive understanding of tagged VLANs.
1. Set up VLANs as shown in the table below:
| VLAN ID | Name | Port Members (Tagged/Untagged) |
| 1 | Default | 1 (U), 2 (U) |
| 5 | Internal | 1 (U), 4 (U), 5 (U) |
| 10 | Web | 1 (T), 9 (T), 10 (T), 11 (U) |
| 15 | Collocation | 1 (U), 2 (U) |
2. Set up the Port VLAN IDs as shown in the following illustration:
The VLANs set up in the preceding procedure produce results as follows: