CS 488/688: Introduction to Computer Graphics
Assignment 1: Rasterization
Summary
In this assignment, you will implement rasterization. Modern GPUs implement rasterization in hardware, and 3D graphics APIs such as OpenGL and DirectX abstract away the details behind it. You will implement a simplified rasterization process in software, meaning that you do 3D graphics without a GPU! Completing this assignment lets you understand the common core ideas used by virtually all graphics APIs for interactive rendering. There are multiple tasks, as described below.
cs488.h, except for the part that says, "you do not need to modify it". In particular, focus on those parts that refer to "A1" and see how those parts are related and called from each other. You will fill in those missing parts in cs488.h throughout the assignments.
Task 0: main.cpp
Comment out A0(argc, argv) and comment in A1(argc, argv) to enable a simple setup code in main.cpp. The default code is trying to load .obj file in the command line arguments as in cs488.exe cube.obj, or it will create a single triangle otherwise. There is one point light source added as well (but it does not matter in this assignment for now). You do not need to prepare or load .obj file at this point. If the code runs, you just see a window that shows nothing. No, it is not a bug. You will code it to show something interesting.
Task 1: Perspective transformation matrix
Your first task is to set up a proper matrix for perspective transformation. Look up void Rasterize() in the Scene class and check out a matrix float4x4 plm there. You need to fill in plm as a matrix that transforms a vertex in the world space (the base code stores all the vertices in the world space) to the clip space (the space where you can perform clipping). Just above Rasterize(), you will see two functions perspectiveMatrix and lookatMatrix that you will need to use by taking into account the current camera parameters. You can find variables for the camera parameters at the beginning of cs488.h. After finishing this task, you will still see the same window.
Task 2: Rasterize points
After you have a proper matrix set up (or at least you believe it is), then you now look up void rasterizeTriangle in the TriangleMesh class. The function rasterizeTriangle takes the plm matrix from above and also takes a triangle in the world space. You can access each vertex in the triangle via tri.positions[0], for example (there are three vertices in a triangle, right?). Figure out how to compute the index i, j of each point and then fill in the pixel by FrameBuffer.pixel(i, j) = float3(1.0f). You basically rasterize the points (vertices) of each triangle. You will see something like this (look for three white pixels):

Congratulations! You can move around this 3D triangle by dragging via the left mouse button and pressing WASDQZ keys (like a first-person shooter). You may now want to try loading some example .obj files. Here is a result of cornellbox.obj.

i, j is in the image. You can do so by calling FrameBuffer.valid(i, j).
Task 3: Rasterize triangles
Now you take those points and fill in the inside of a triangle. The lecture should have covered how to do it, but basically, you will need to loop over pixels in FrameBuffer and fill in those pixels inside the triangle. At this stage, filling in those pixels with a proper colour assigned for each triangle would be interesting. You can access it via the float3 variable materials[tri.idMaterial].Kd. You will see an image like this for the single default triangle.

Task 4: Depth buffering
If you load cornellbox.obj at this point, you will see something like this:

Is that correct? Actually not. This .obj file is supposed to be looking like this instead:
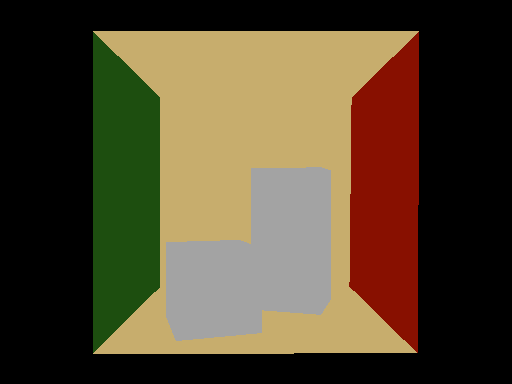
What's wrong? It is because you have not implemented depth buffering. You can access the depth buffer via
FrameBuffer.depth(i, j) which is already initialized for you in each frame. Use this depth buffer to figure out how to perform correct z-buffering. You need to compute a proper depth by interpolating a transformed z value at each vertex. If it is working, you will see the above image.
Task 5: Perspective correct interpolation
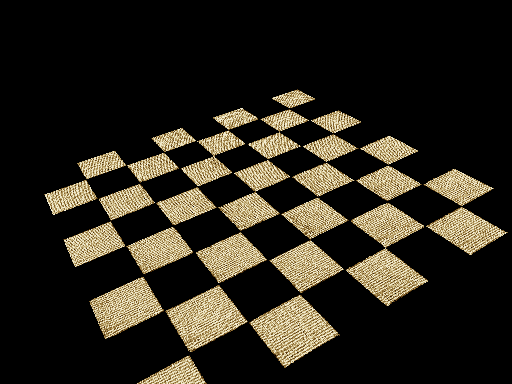
For this task, you need to call static float3 shade to fill in the pixel value to fetch a texture. To do so, you need to fill in the member variables of the HitInfo class. For this assignment, you need to fill in T, which stores a texture coordinate. Your task is to interpolate to fill in T and then call the shade function. Note that material pointer can be filled in as material = &materials[tri.idMaterial]. You can access the texture coordinate at each vertex as tri.texcoords[0] which is float2. You need to interpolate those via perspective-correct interpolation.
If you load textured.obj with (perspective) incorrect interpolation, you will see something like this:

The correct rendering with perspective correct interpolation will look like this:
Extras
All of the assignments come with optional extra tasks for those of you who would like more challenges and potentially gain extra points! Specification of an extra task is intentionally very-high level. Explain what you did in README if you want an extra point. You may or may not receive an extra point depending on our evaluation.
Extra 1: Faster rasterization
The basic rasterization algorithm explained in the lecture is working, but not the fastest possible. Make your rasterization faster. Report the performance boost. We expect you to do something algorithmic, not just change compiler options or minor coding optimization. You can also do any optimization, except for using other libraries or APIs. Make your rasterizer as fast as possible!
Extra 2: Proper clipping
You are not required to implement proper clipping in this assignment. However, implementing clipping would be helpful if you expect a triangle to intersect with the near plane. Implement proper clipping and demonstrate the difference.
What to submit
The submission process for this assignment is basically the same as the one for Assignment 0. Prepare a ZIP file of your code, omitting unnecessary files (executables, build files, etc.). Upload the ZIP file to LEARN.
As with Assignment 0, you must submit the README. In this assignment, you need to provide multiple screenshots to demonstrate what you achieved in each task. Name them as screenshotTask2.png etc., to clarify which task you are referring to. If you omit either of the files, you will receive a deduction. See Assignment 0 for instructions about how to prepare these files.
If you do extend the base code, be sure to document your extensions in your README file. Keep in mind that
you must still satisfy the core objectives listed here. If your changes are so radical that your modified program is
incompatible with the original specification, you must include a "compatibility mode" that makes the interface behave like the requirements here, or consider creating an entirely separate project (but hey, is that making sense?).
Other thoughts
After completing this assignment, you will have your basic rasterizer ready for some interesting interactive applications. Think about how you might want to extend or any additional rasterization techniques you might want to implement on top of it. Those are great candidates for your final project; maybe you can rocket-start already to work on some of them!
Objectives
Every assignment includes a list of objectives. Your mark in the assignment will be based primarily on the achievement of these objectives, with possible deductions outside the list if necessary.
- A correct matrix for perspective transformation is computed.
- Vertices of triangles are properly rasterized.
- Triangles are properly rasterized.
- Depth buffering is working correctly.
- Perspective correct interpolation is done.