CS 488/688: Introduction to Computer Graphics
Assignment 0: Warmup
Summary
The goal of this assignment is to get you accustomed to things that we will use throughout the term. There will be a small amount of coding.
This assignment is optional. It is there for you to help avoid losing marks on future assignments for reasons that have nothing to do with understanding the material (such as misunderstanding the submission instructions or failing to include appropriate documentation). If you do not hand it in, you will not lose marks. If you hand it in, it will be marked as usual, but it will not count toward your final grade. Completing Assignment 0 will help you avoid making such mistakes when it matters. You'll also get some direct experience with the kind of code you'll be writing throughout the term.
Conversely, it's always possible that we've introduced errors in the code we're distributing to you this term. In particular, we have made significant changes to the base code and assignments in S23, so things might be somewhat unstable. Thus, it's helpful for you to complete Assignment 0: your feedback will help us iron out any problems before they derail future assignments.
The directions in this assignment are more explicit than in the remaining assignments. In the other assignments, the following steps will not be given in so much detail.
Step 0: Course information
Get acquainted with the information associated with this course. Read the main course web page. Read the course web page and ensure your responsibilities are clear and familiar with the marking scheme. Read the additional notes regarding assignments before completing this assignment or submitting anything.
Step 1: Piazza
You will need to enroll on the Piazza page for this course to ask questions, help your fellow students, and keep up with timely announcements. Look at the LEARN web page of CS488 to find the registration link. Please register as soon as possible.
Step 2: Framework
Many traditional courses in computer graphics use OpenGL for 3D graphics, where students have to go through specifics of OpenGL APIs (which are not very useful in practice, in our opinion). Some modern courses use a complete graphics framework such as Unity to focus only on high-level ideas (which hide too many fundamental concepts, in our opinion). For this course, we seek a middle ground: enough infrastructure to help you get started without hiding the technical details of fundamental concepts. Our framework is educationally designed, so you will get to touch the fundamentals of 3D graphics. You do not call OpenGL APIs - you implement those features by yourselves. We're using the following:
- C++
- GLEW, a cross-platform open-source C/C++ extension loading library for OpenGL extensions (used just for drawing images - you do not need to use those extensions by yourself).
- GLFW, a simple framework that wraps an OpenGL context inside a window and manages user events (used for opening a window and providing simple UI - again, you do not need to deal with GFLW by yourself).
- linalg, a mathematical library for the parts of linear algebra needed in computer graphics.
- stb, we use stb_image.h and stb_image_write.h for loading and writing image files.
- gif.h, for capturing an animated GIF.
- cs488.h, a single header framework for this course.
You are expected to keep developing on top of the initial cs488.h throughout the course. For example, once you completed assignment 1, your cs488.h is now capable of rasterizing 3D objects, and you can use it as your starting point for assignment 2 (e.g., using rasterization as an interactive rendering mode). The idea is that you have your customized graphics engine at the end of A3, which is at least capable of rasterization, ray tracing, and simple physics-based animation. We do not allow you to build on top of another framework than cs488.h.
We will use CMake to build the code to avoid potential problems with missing libraries or incorrect versions. You will clone the repository that contains the source code for all these libraries, bundled with skeleton code for the assignments. The external libraries are incorporated as git submodules, so you will need to run the following commands to clone the repository:
$ git clone --recursive https://git.uwaterloo.ca/w576wang/cs488Make sure to include
--recursive such that all external libraries will be cloned in ./external. You shouldn't need to change anything in that directory. Our CMake files specify that the code will be compiled with C++14. If you prefer to use c++17, then edit ./CMakeLists.txt and change "set(CMAKE_CXX_STANDARD 14)" to "set(CMAKE_CXX_STANDARD 17)".
Let's try to configure the build step by step. We encourage you to use solid IDEs like Visual Studio or Clion etc. If you prefer VS Code or something else, feel free to use it. Now we will show how to set things up on Windows using Visual Studio or Mac using Clion (you can use your student account to get a free license) or Linux using VS Code. You may skip reading the rest of Step 3 if you know what to do, given the code. Ask the TAs if you have any questions about building the base code.
Step 3a: Build on Windows
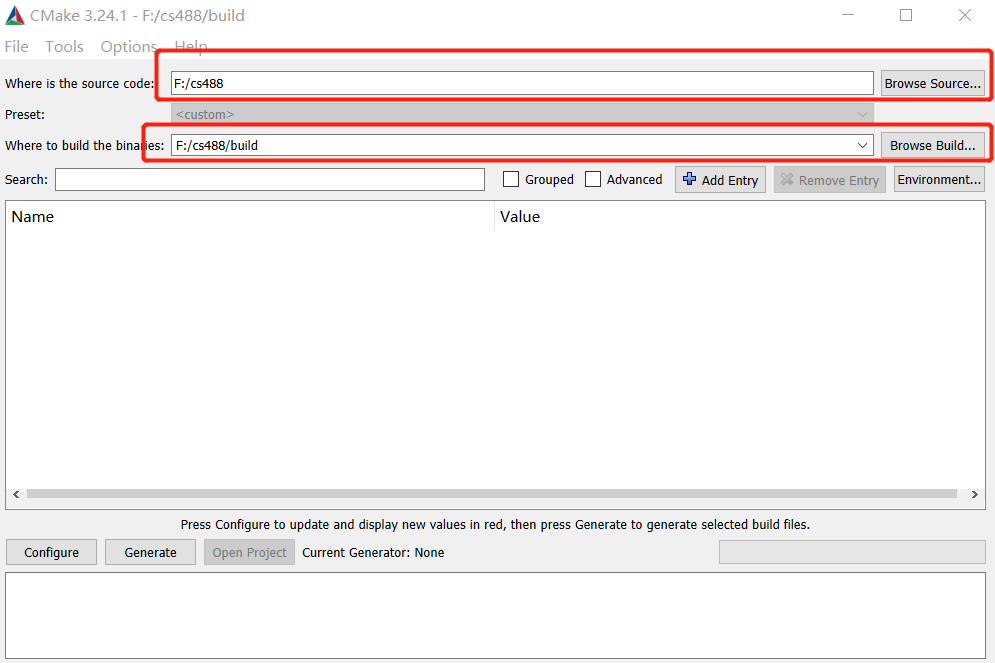
If you are familiar with CMake on Windows, you probably want to skip reading this step. To use CMake on Windows, a good choice is to use CMake GUI and Visual Studio. Both of them can be downloaded and installed using the x64 installer. After installation, you can open CMake GUI and set the source code directory to .../cs488 and set the build directory to .../cs488/build.
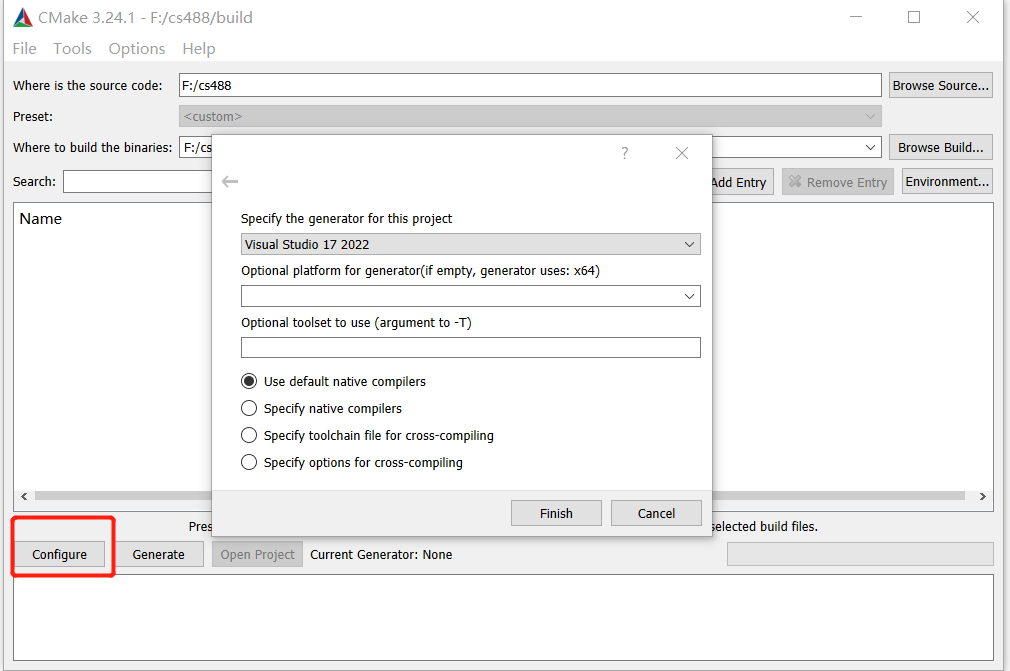
Then click "Configure" and choose "Visual Studio 17 2022" as the generator.
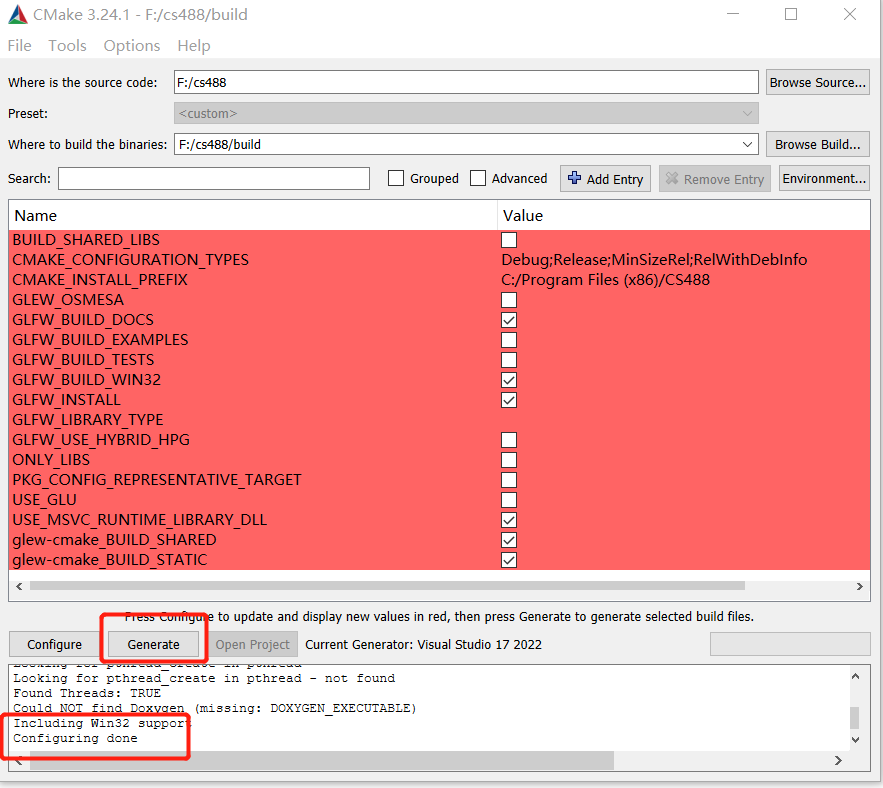
After that, you will see a list of options you can set, but you don't need to set anything for now. Just click "Generate," and you will get a Visual Studio solution file in .../cs488/build named CS488.sln .
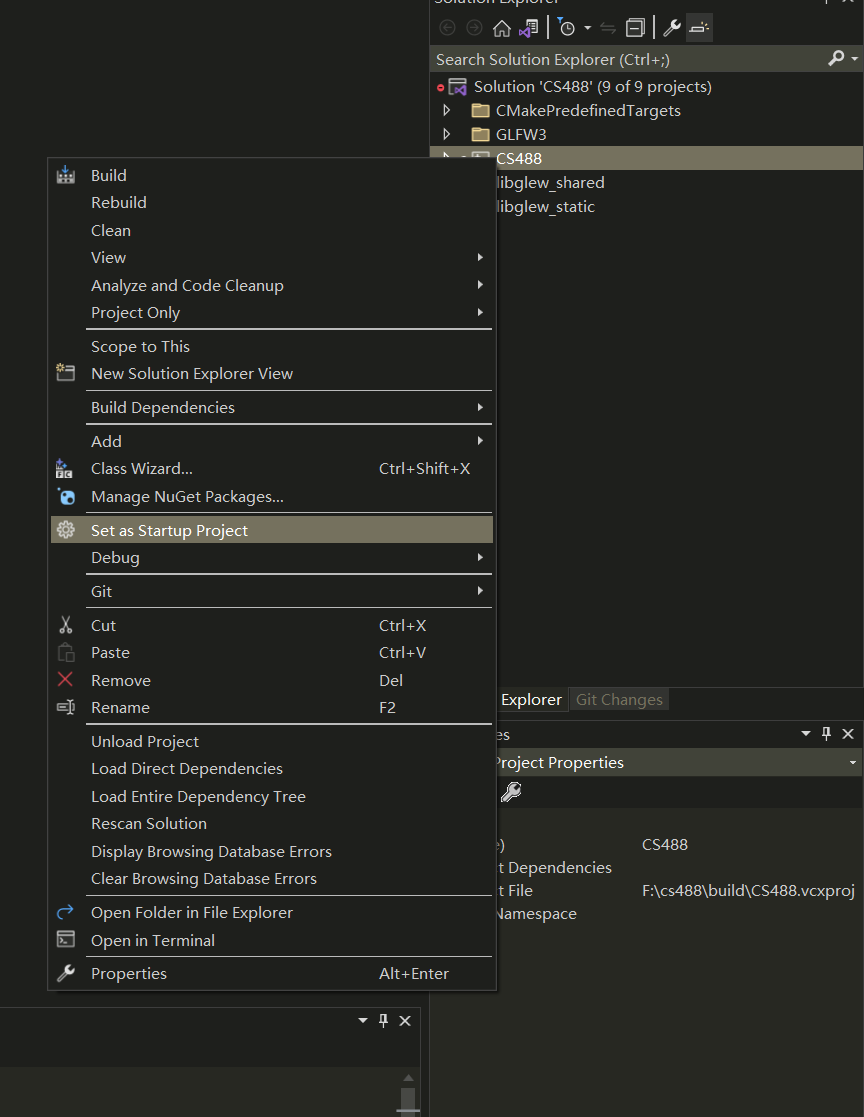
Now, you can open the solution file in Visual Studio and build the project. Don't forget to set CS488 as the starting project so you can now click "Local Windows Debugger" on the top to build and run the solution.
Step 3b: Build on Mac
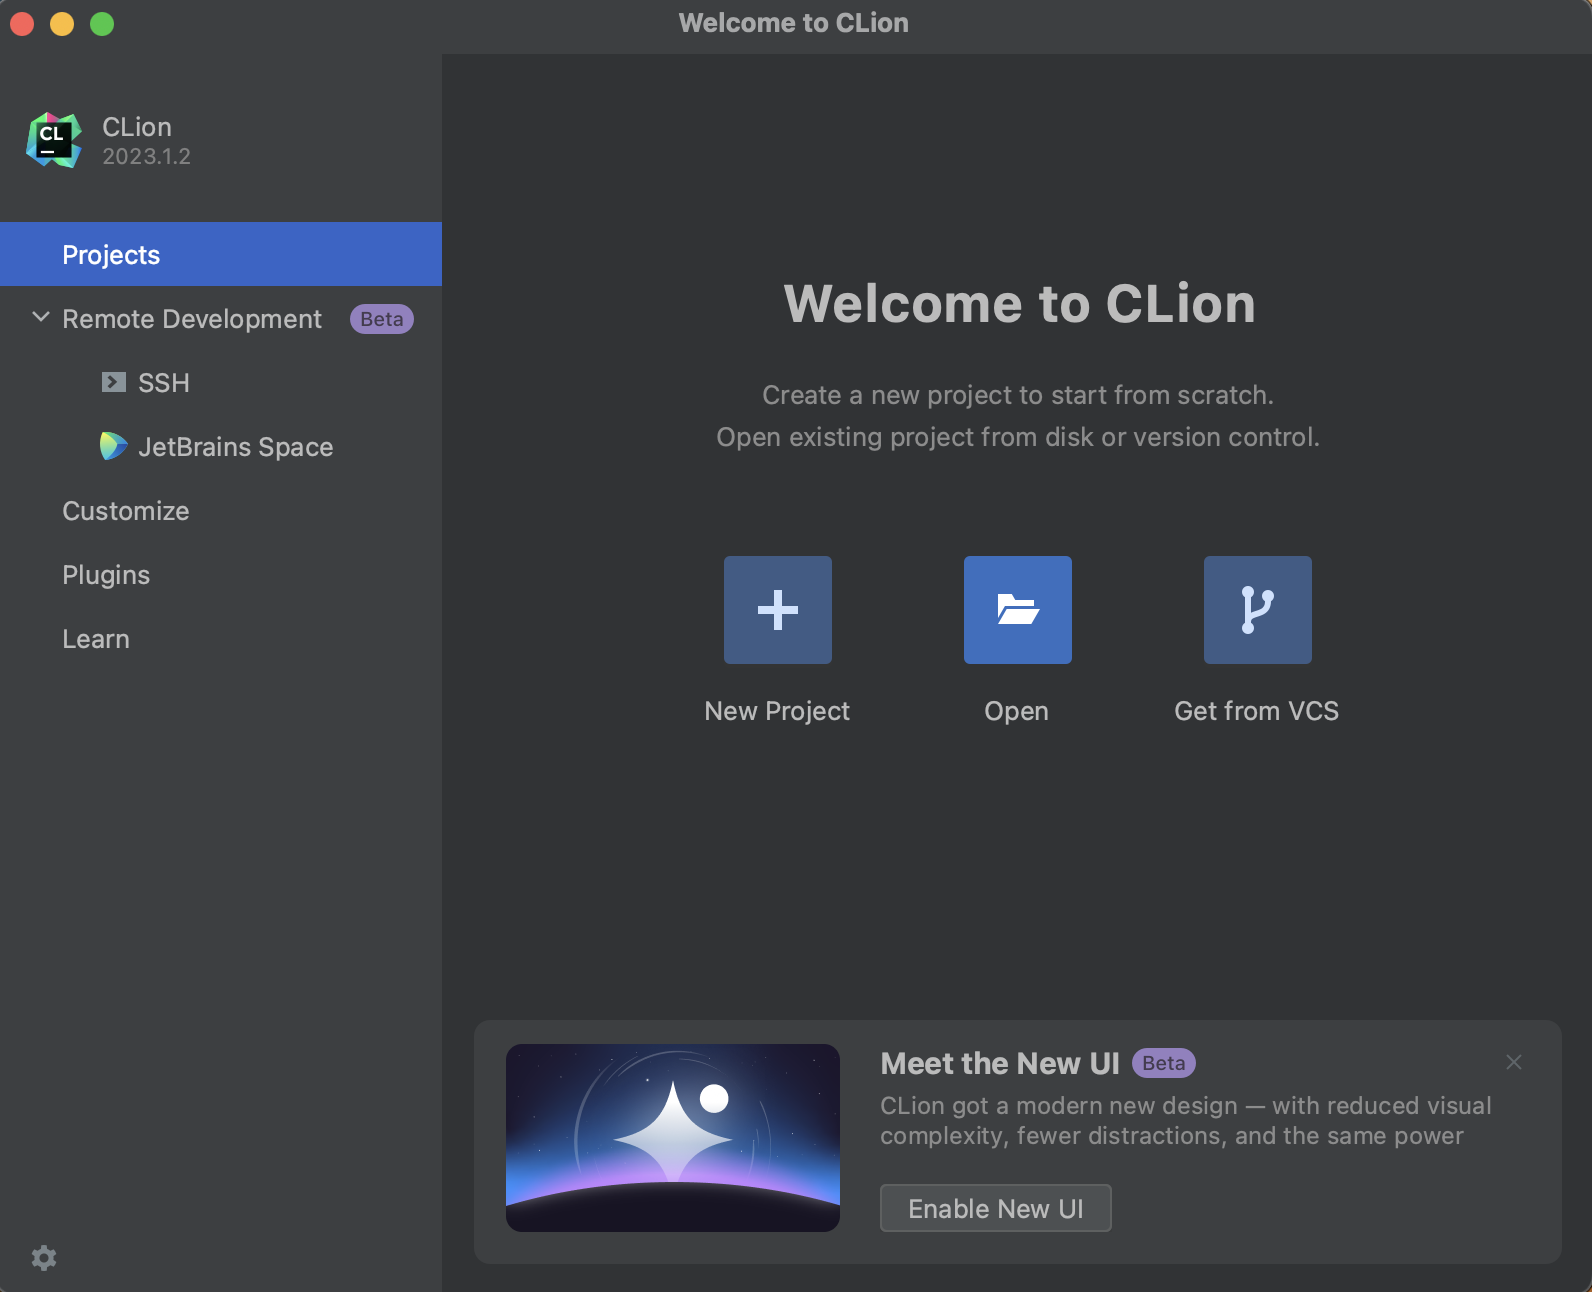
If you are familiar with Clion, you can skip reading this step. Before opening Clion, make sure you have installed CMake on your Mac. To use CMake on Mac, we will use Clion instead of XCode (more friendly to beginners). After installing Clion, open it. Click Open in the middle, and then we can directly select the repository folder to create a Clion project.
After creating the project, Clion will automatically configure it based on the CMakeLists.txt. You can check the progress from the CMake window at the bottom.
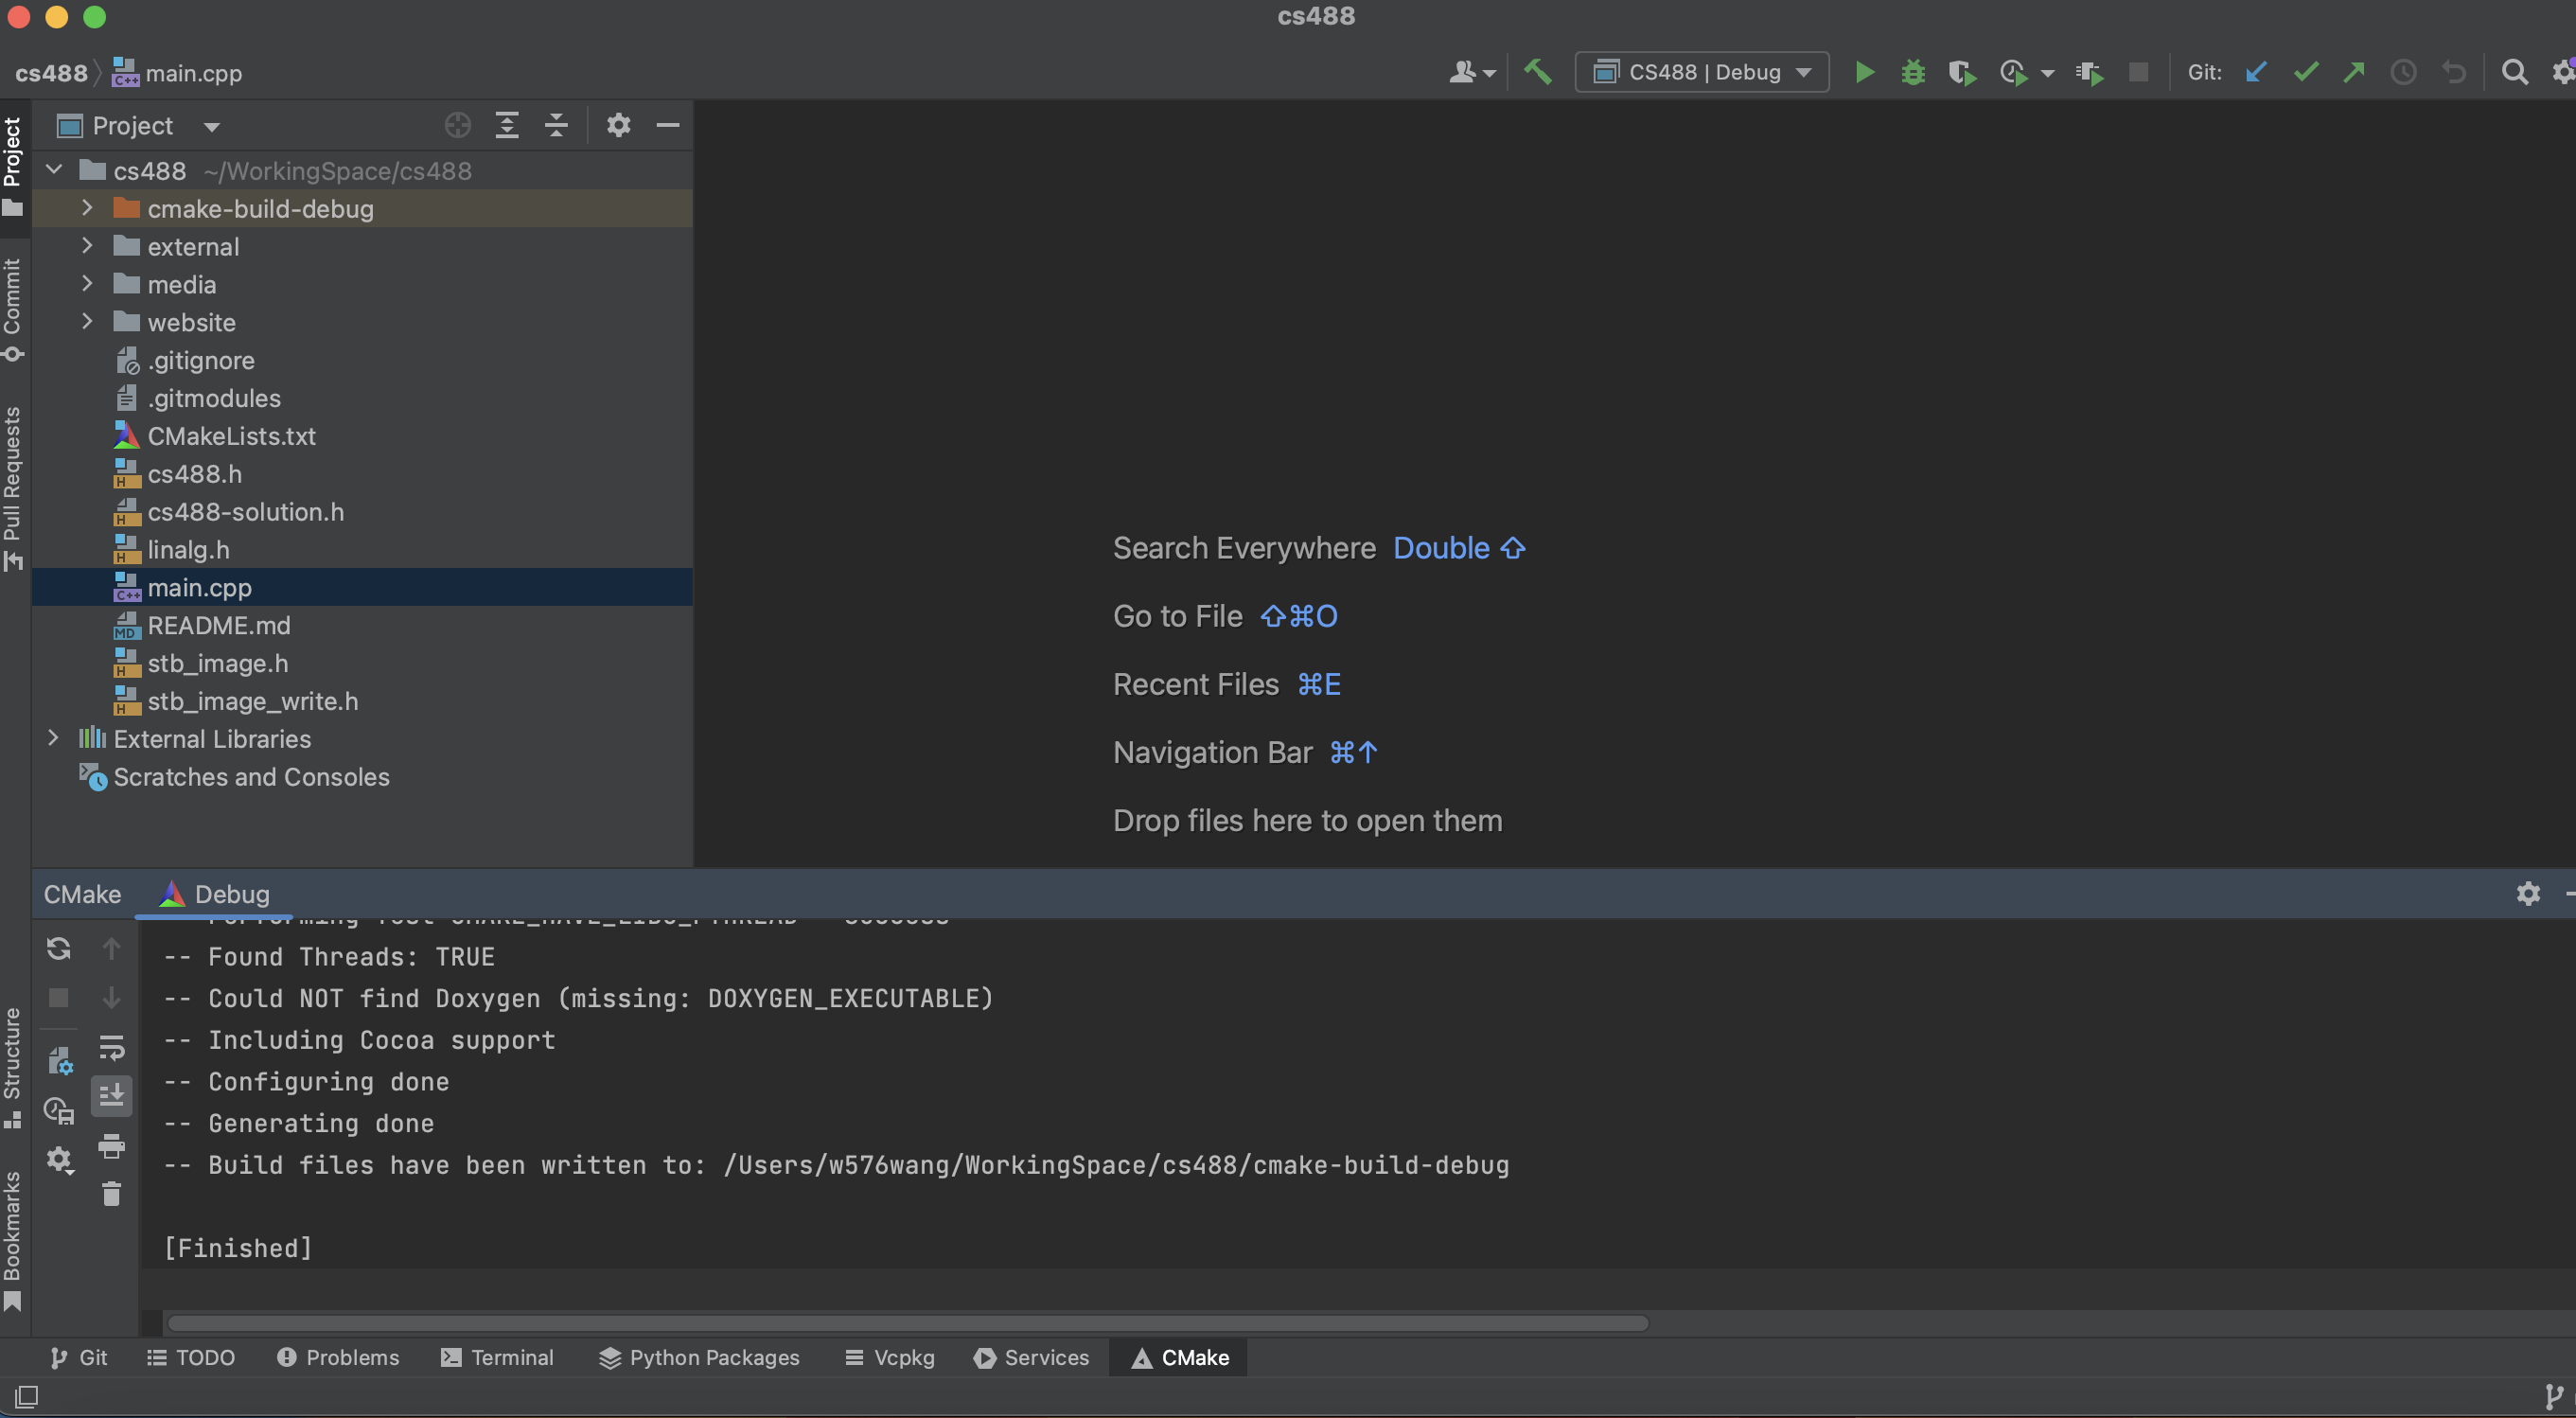
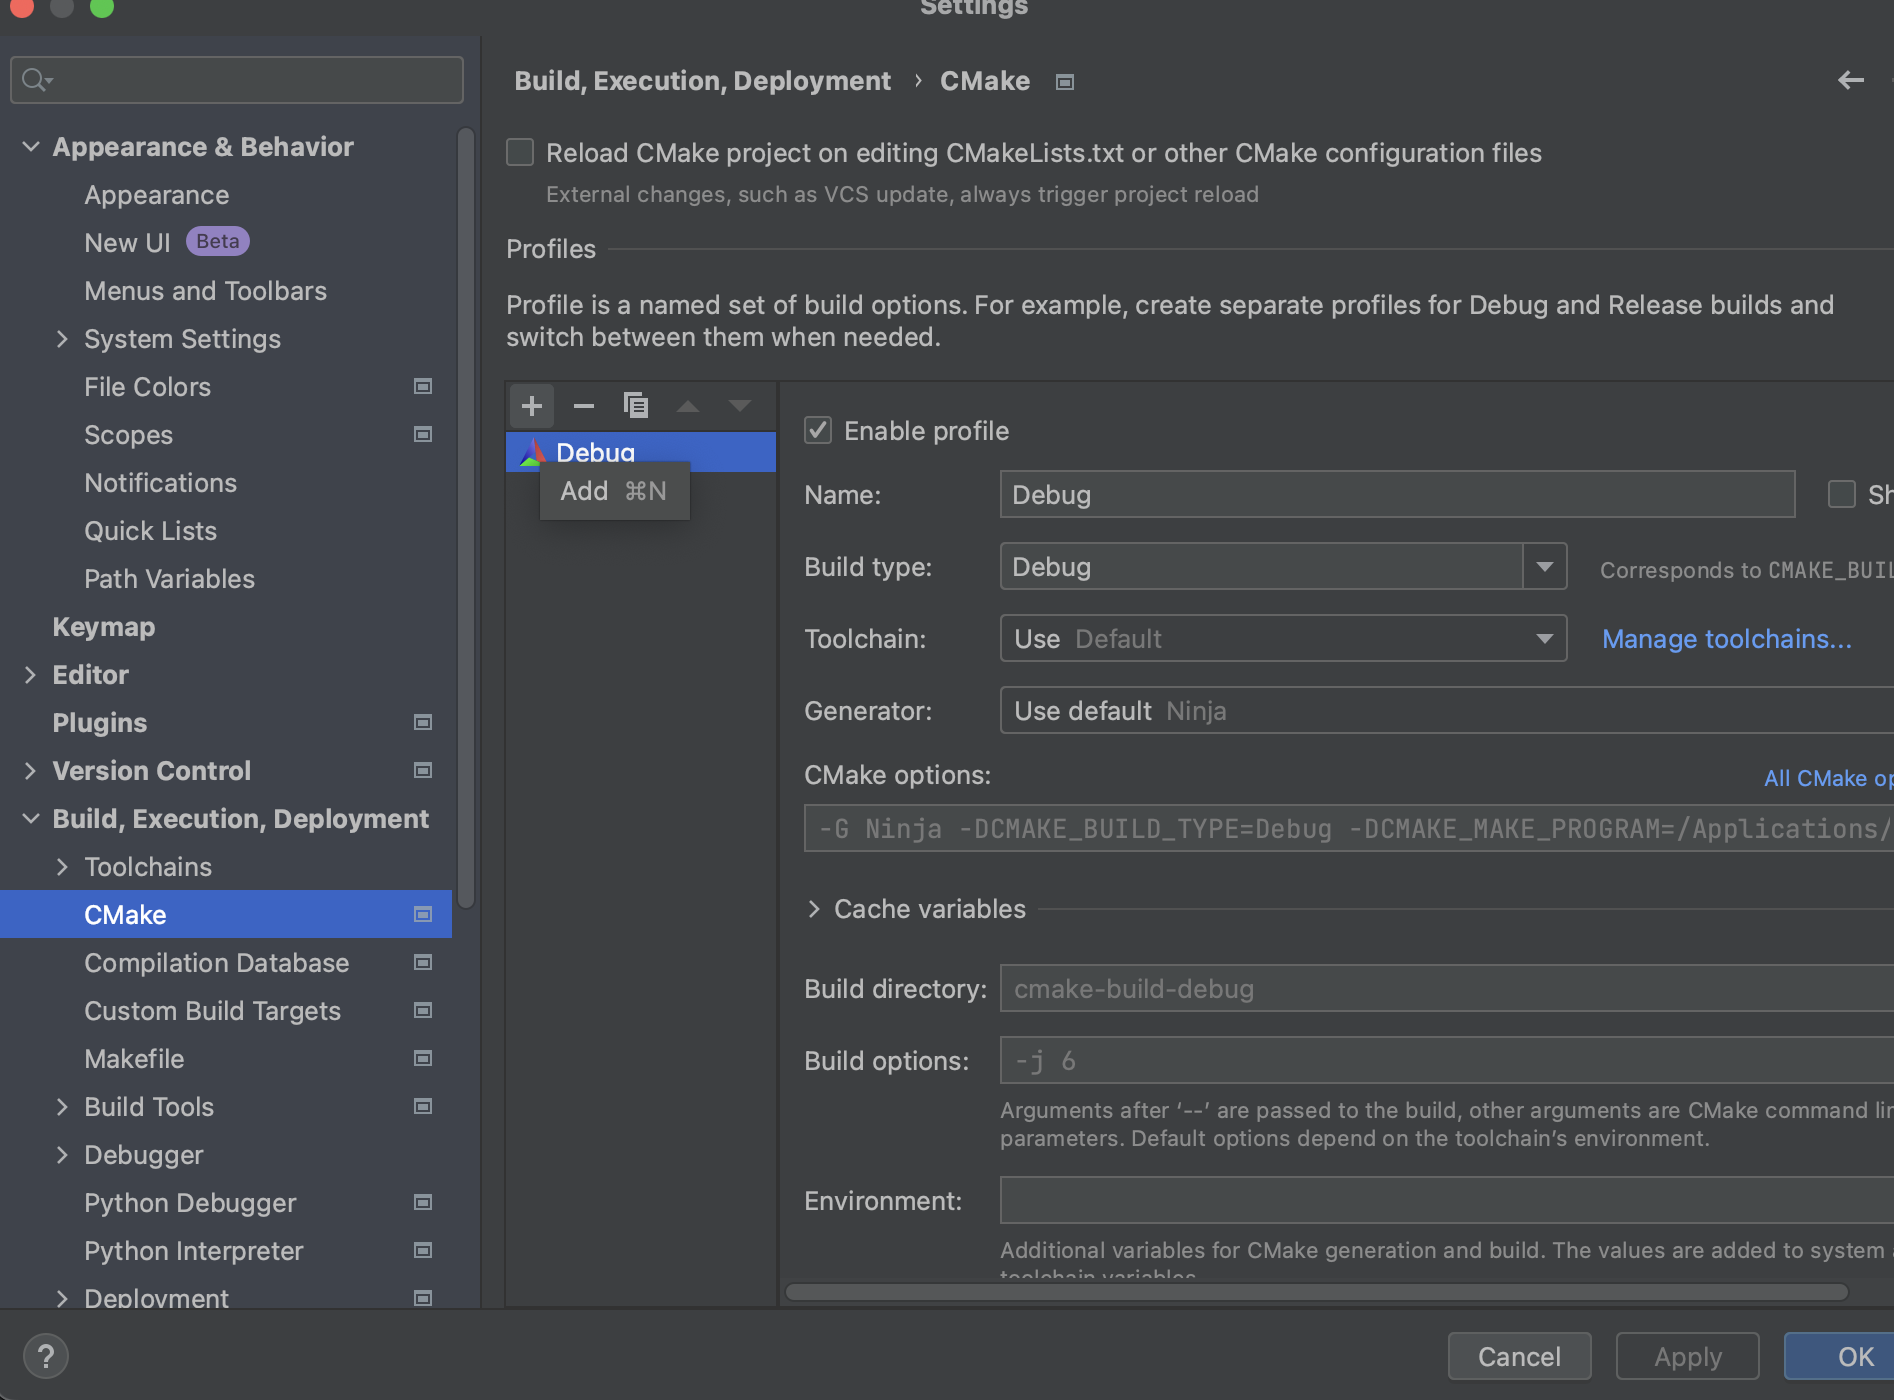
Now, you can click the green triangle on the top to build and run the project. One thing is missing if you want to run with the release mode. What you need to do is go to CLion | Settings | Build, Execution, Deployment | CMakeand click + to add a release build.
Step 3c: Build on Linux
If you are familiar with CMake and GCC, you can skip reading this step. Please make sure you install CMake (e.g., through your default system package manager such as apt-get on Ubuntu) or by getting the pre-built binaries from Download page) and GCC (sudo apt-get install build-essential on Ubuntu). Create a new directory for the build, change to that directory, and run cmake [path to CS488]. A Makefile will be created in the current directory. Next, run make to build CS488. Depending on the number of cores in your system, you will probably want to supply make with the -j parameter to specify the number of compilation jobs to run in parallel (e.g. make -j8).
If you prefer debugging your codes on IDEs, we provide a tutorial for configuring the CS488 project on VS Code. If you don't plan to use or are familiar with VS Code, you can skip reading this step.
To complete the tutorial, please install the following:- VS Code
- C++ extension for VS Code. Install the C/C++ extension by searching for 'c++' in the Extensions view (
Ctrl+Shift+X). - CMake Tools extension for VS Code. Install the CMake Tools extension by searching for 'CMake tools' in the Extensions view (
Ctrl+Shift+X).
Open Visual Studio Code and select File → Open Folder.. from the program menu. Next, browse to where we cloned the CS488 project. The directory contains the CMakeLists.txt file, so [path to CS488].
VS Code might ask you if you trust the author of the files in the folder. You can click the Yes, I trust the authors button.
After importing the CS488 into VS Code, move your gaze to the status bar at the bottom:

You can see two interesting things here:
- CMake:[DEBUG]:Ready. This message shows that VS Code detected that our project is a CMake project. By default, it will build a debug version of our application. Which is perfect during development, and we can leave it at that. If you ever want to change the build type, you can click on this text in the status bar.
- No Kit Selected. A kit means the C/C++ development tools we prefer to use. For example, GCC or CLANG. You might have multiple development tools installed on your system. Therefore we need to inform VS Code's CMake extension which one to use.
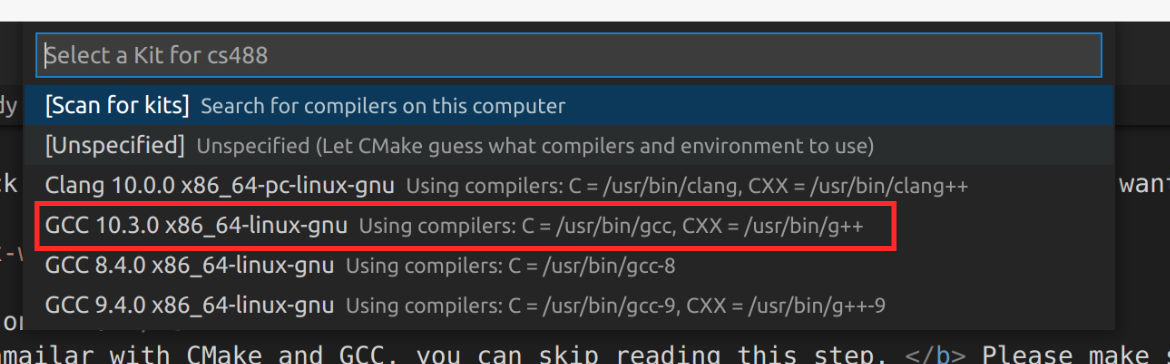
At this point, the only step left is to let VS Code know which kit we prefer to use in combination with CMake. To select the kit, click on the No Kit Selected text in the status bar. A selection box pops up at the top, where you can select C/C++ development tools that Visual Studio Code detected on your system. We installed GCC at an earlier step, so select that option:
We are all set to do actual development work on our C/C++ application. Let's start by building the CS488 program. Click on the Build text in the status bar or press F7. In the Output window, you can follow the progress. After building the program, we can run or debug it. To run the program, click the little play icon in the status bar or press Shift+F5. To debug the program, click the little bug icon in the status bar or press Ctrl+F5. The program output appears in the Terminal window.

Step 4: Modify main.cpp
By default, the code will render white noise. Modify static void draw() in main.cpp to something new. The commented-out code provides another example besides white noise. FrameBuffer.pixel(i, j) in this function refers to a pixel at (i,j) which stores float3(r, g, b) as the red, blue, and green components of this pixel. For example, FrameBuffer.pixel(i, j) = 1.0f means that the red component of this pixel is set to the maximum intensity. You can set a value more than 1.0, but that would not make it any brighter. You can also set a negative value, but it will be clamped to 0.0 when drawing. globalFrameCount is incremented every time this function is called.
Step 5: README
For programming assignments, you will be required to create a text file called README. Place your README file in your submission. The README file should contain two sections:
- Compilation: Give short instructions on how to compile and run the program if there are any changes relative to the default build system. Mention any additional assumptions (for example, if the program must be run from a particular directory). TAs may ask you for more details after the due date.
Specification: This part is not a restatement of the assignment specification. It should include any details or assumptions you made that were not included in the assignment. Tell us about any extra commands, options or features you added or any additional files you may have generated. If you have made any assumptions about the assignment specification or the objectives, state and justify them here.
You should also note whether each objective is completed in your README. If you wrote code for objectives that you did not get completed, you might request partial credit there.
Step 6: Submitting your program
Create an A0.zip containing all your files. Please do not include the default external libraries (GLEW, GLFW, linalg.h, gif.h, stb, etc.), as the TAs will have them set up on their end. Upload it to LEARN. Avoid including unneeded build files or any other temporary files (e.g., .DS_STORE junk).
We highly recommend that after submitting, you download your own A0.zip file, unzip it and build it to ensure that everything compiles and builds as expected. Be sure to test that your submitted A0 executes correctly and matches your expectations.
Take special care, as your machine may have a newer compiler. As such, your code may not compile on our side, especially if you use features that might not be widely available.
In addition to the code, you are generally asked to provide a saved image (aka., screenshot) of your result(s). You can save your current result by pressing the "I" key. The file name will be a random number, so rename it to screenshot.png and include it in your zip file. In later assignments, you may need to provide multiple images to demonstrate your results.
Step 7: Objectives
Every assignment includes a list of objectives. Your mark in the assignment will be based primarily on achieving these objectives, with possible deductions outside the list if necessary.
- Registered on the Piazza page.
-
The file
A0.ziphas been submitted and contains the correct files. -
Included in appropriate
READMEthat explains your modification. -
Included an appropriate screenshot as
screenshot.pngthat shows your modification. - The program renders something other than noise.