How to setup CVS though SSH (Putty)
CVS is a version management system that allows you to retrieve your historical data, and to allow multiple users cooperate on one project. Since our CVS repository is on softbase, which has automatic backup system, another advantage of using CVS is that you don’t need to worry about backing up your source code or reports.
This article is a guide on how to install Windows CVS client and connect CVS server using putty (plink). http://prdownloads.sourceforge.net/cvsgui/WinCVS-SSH-Guide_pdf.zip?download introduces how to install WinCVS through OpenSSH. Since current WinCVS only support SSH1 protocol, using putty and OpenSSH has no differences.
1. Install CVS Client
If you’re working on a Windows system, you need a CVS client. WinCVS is the most popular CVS client on Windows. You can download the version 1.3 beta 10 from http://www.wincvs.org/download.html. Don’t download the stable version 1.2 since it doesn’t support SSH.
In order to run WinCVS, you need to install Python, which can be downloaded from http://www.python.org/. The current version is 2.2.2 and it works fine with WinCVS 1.3b10.
2. Install SSH Client Putty
Go to http://www.chiark.greenend.org.uk/~sgtatham/putty/download.html, and download putty.exe, pscp.exe, plink.exe, and pageant.exe, say put them in C:\PuTTY\.
You need to config SSH to allow public key authentication:
- Generate your private/public key pairs:
Log onto softbase(db) using your own account, run
$ ssh-keygen
–b 1024
press enter on every prompt. It will generate two files ~.ssh/identity and ~.ssh/identity.pub, which are the private and public key files.
- Install your public key in the ddbms@db:
You can install your public key on softbase such that it won’t prompt passwd when you “ssh” to db using ddbms account.
Log onto db using ddbms account:
$ rlogin db –l ddbms
$ scp
<your_userid>@db:.ssh/identity.pub
<user_id>.pub
$ cat ~/.ssh/<user_id>pub >>
~/.ssh/authorized_keys
$ chmod
400 ~/.ssh/authorized_keys
Note that you have to use DOUBLE
greater-than sign to append your public key to the authorized_keys,
otherwise you will overwrite others’ public keys.
- Install your private key on your Windows System:
On your Windows system C:\PuTTY\,
C:\PuTTY> pscp <user_id>@db.uwaterloo.ca:.ssh/identity
<user_id>_identity
C:\PuTTY> pageant <user_id>_identity
C:\PuTTY> plink –ssh ddbms@db.uwaterloo.ca ls
The first command copies your private key file to C:\PuTTY\ (make sure don’t share this directory and make it secure). The second command runs the private key administrator (pageant.exe) to register your private key. After registration, you shouldn’t need to private passwd when you ssh to db using account ddbms. The third command test plink working fine with your private key. The first execution of plink will ask you whether to remember the host to your known_host file, just enter Yes. If plink doesn’t ask for passwd and it “ls” the home directory of ddbms on db, you’ve already successfully configured SSH client.
3. Configuring WinCVS with PuTTY
Start WinCVS and select AdminàPreference, you’ll see:
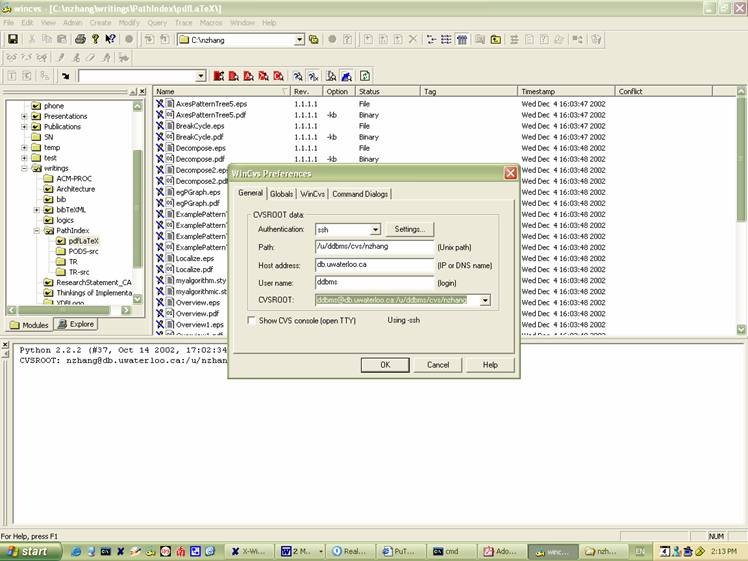
Select “ssh” on Authentication, and click “Settings…”
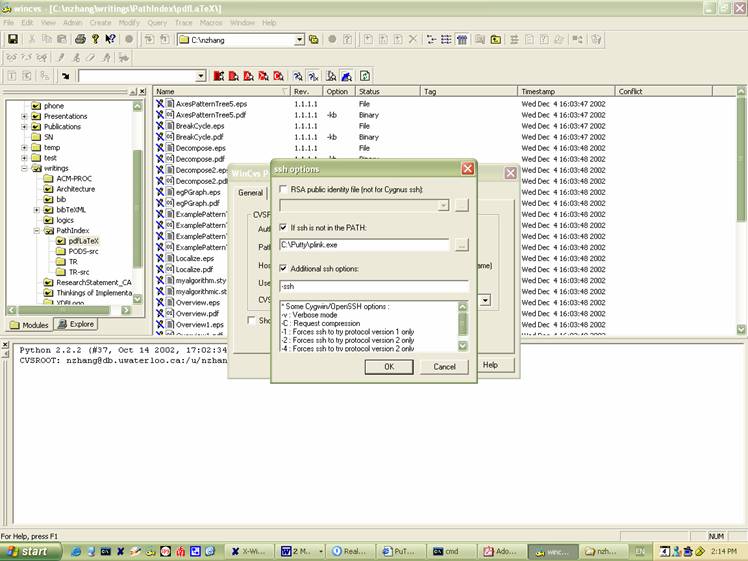
Check the checkbox “If ssh in not in the PATH:”, and select “C:\PuTTY\plink.exe”, check the checkbox “Additional ssh option:”, and enter “-ssh”. Then click OK.
In the WinCVS Preference dialog:
Set “Path” to: /u/ddbms/cvs/<your_userid>
Set “Host Address” to: “db.uwaterloo.ca”
Set “User Name” to: “ddbms”
The CVSROOT is automatically setup.
After this step, you can check out modules and import modules. An example is available at http://prdownloads.sourceforge.net/cvsgui/WinCVS-SSH-Guide_pdf.zip?download